
The Best Agenda For Design-Level Event Storming
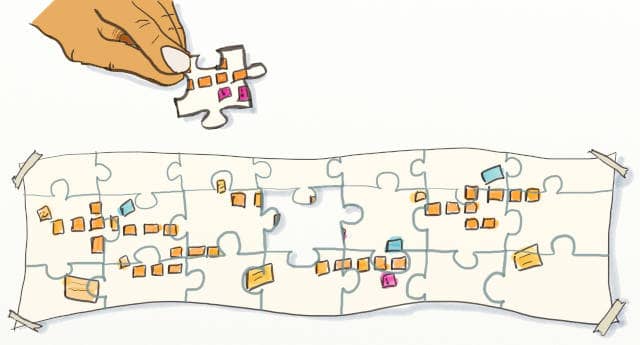
Use Design-Level Event Storming to identify Aggregates, UX mockups, and other design elements. Just follow this agenda through your first facilitation!
So, here you are! You have identified a business-critical bounded context. (Remember, bounded contexts are just functional areas) It is the perfect occasion to use Design Level Event Storming!
Let’s see how to get started!
Big Picture is about exploring. Design-Level is about designing and building.
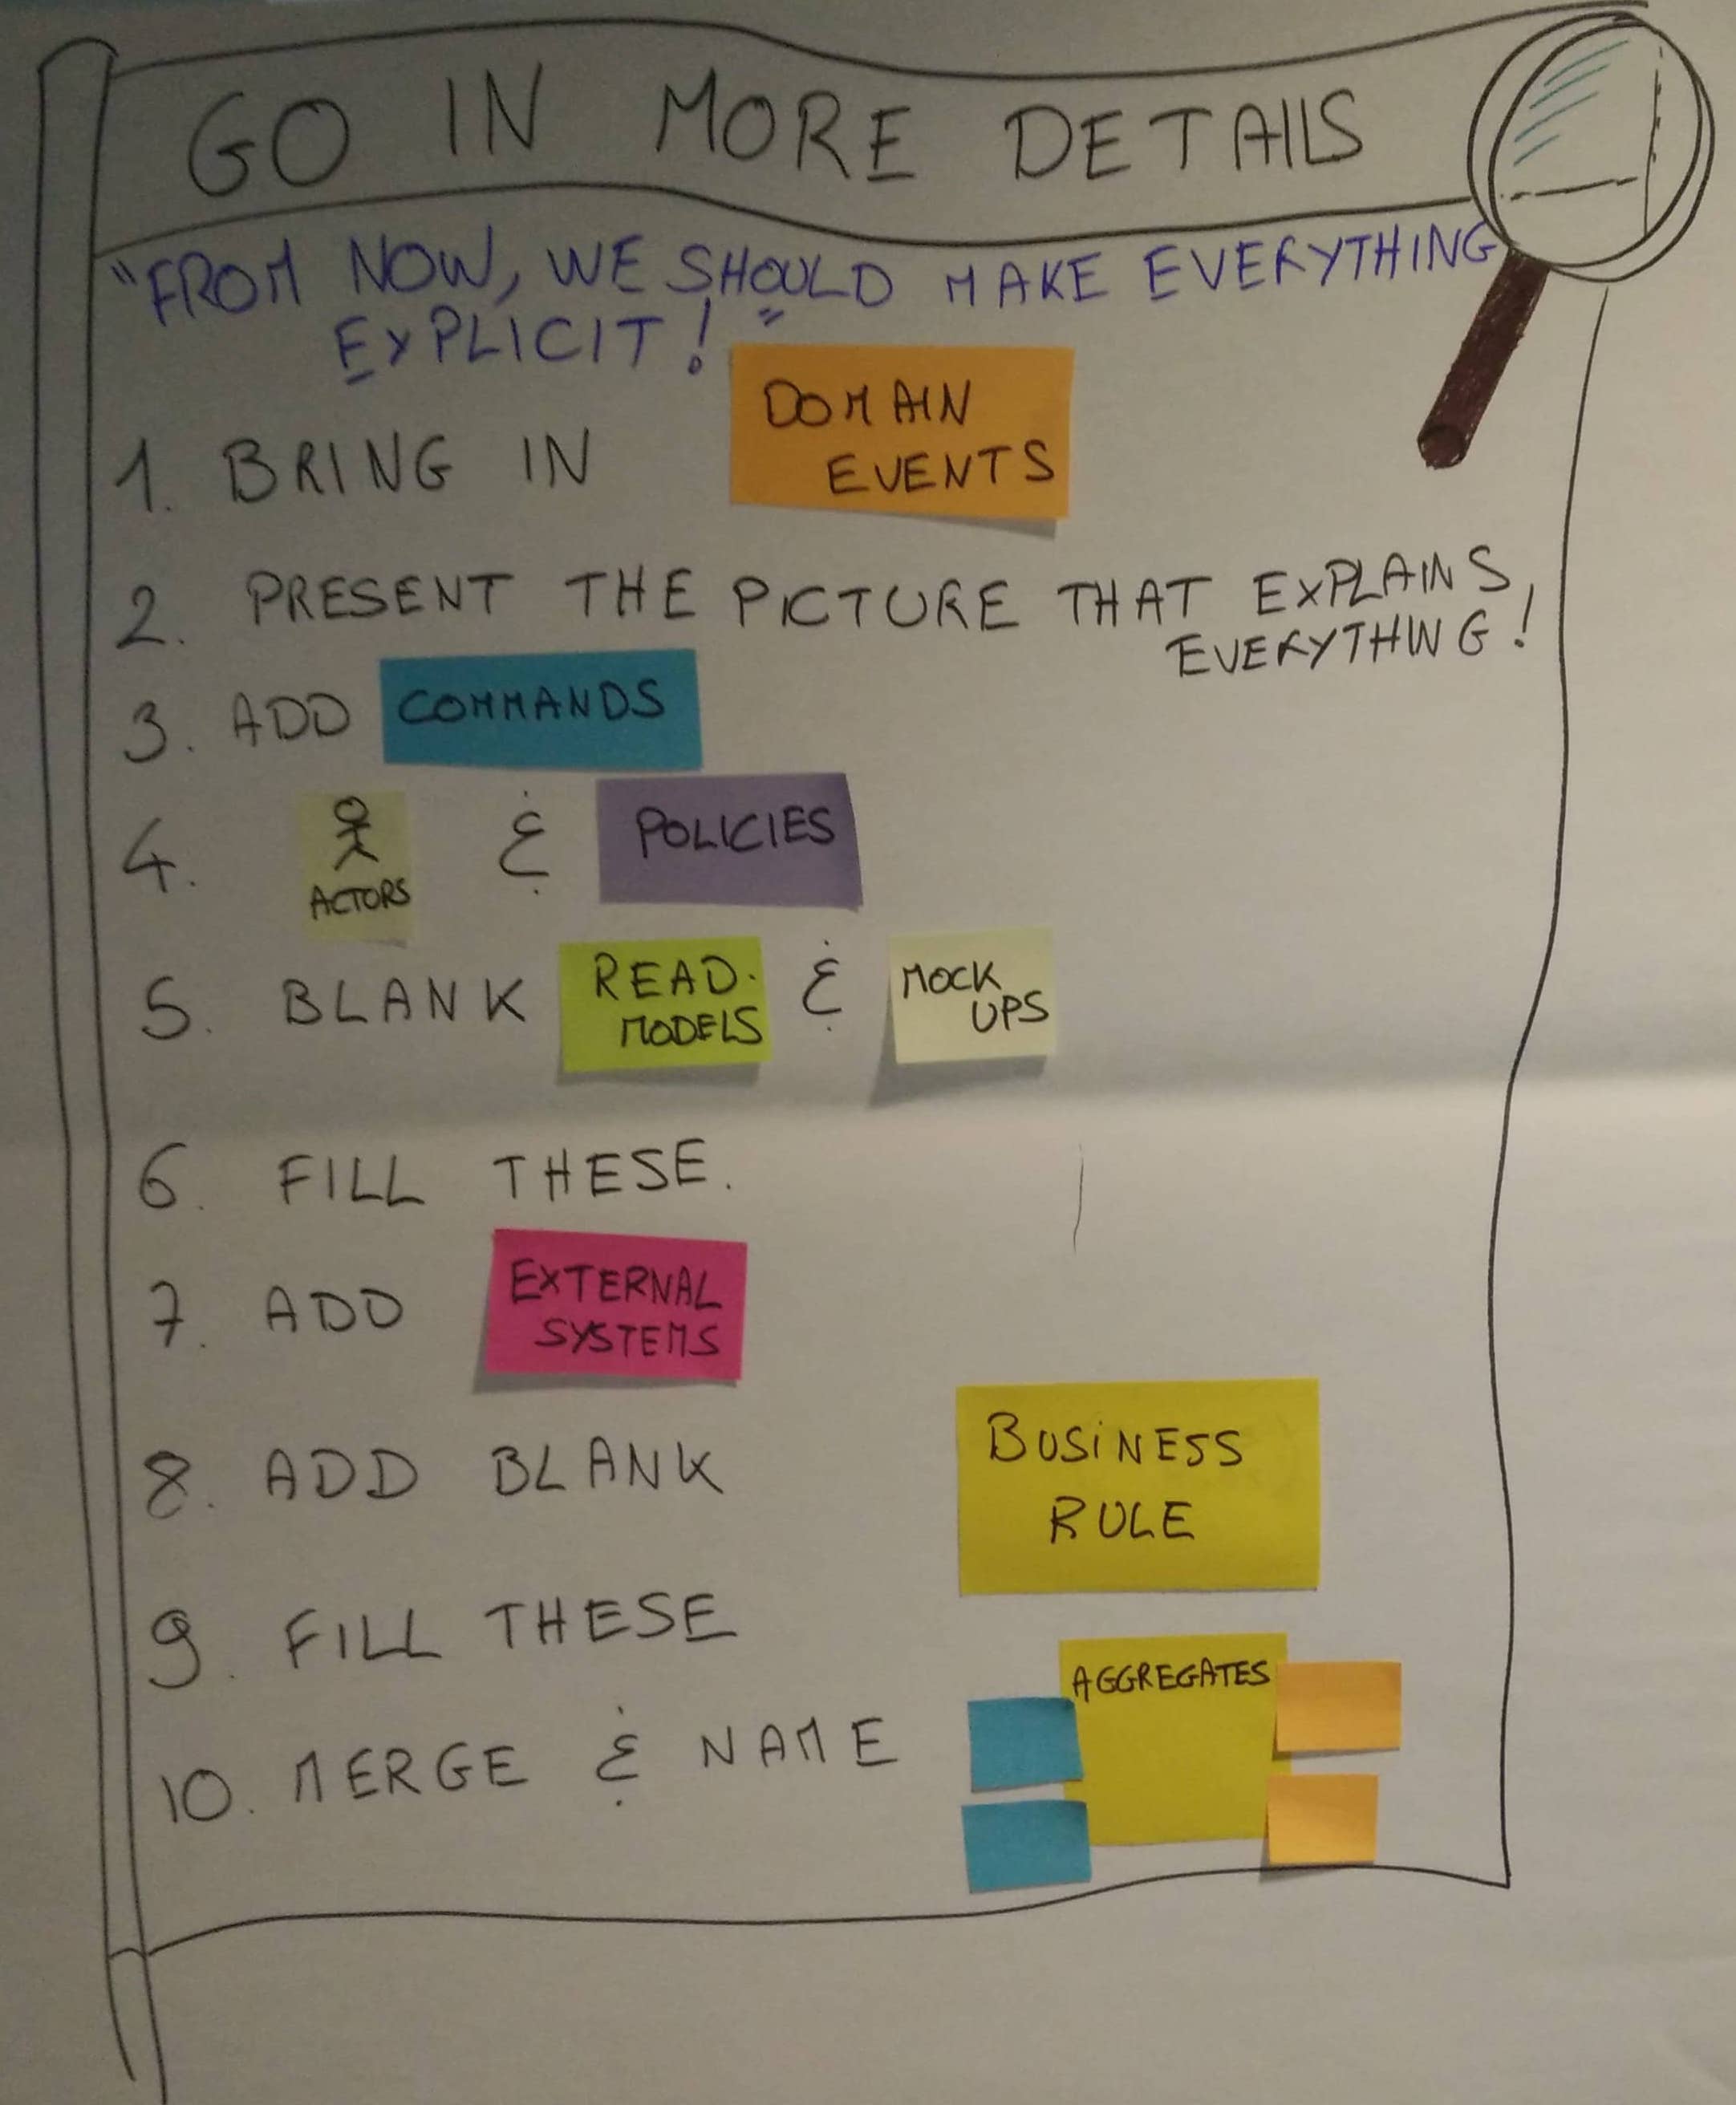
Here is a detailed and step-by-step agenda that you can follow to facilitate your Design Level Event Storming. You’ll see that many steps in the workshop are almost mechanical. So, follow the guide, and everything will go well!
- The target design
- Domain Events
- Commands
- Actors and Policies
- Blank read-models and UX mock-ups
- Read models and UX mock-ups
- External Systems
- Blank Business Rules
- Business Rules
- Aggregates of Business Rules
- Aggregates Names
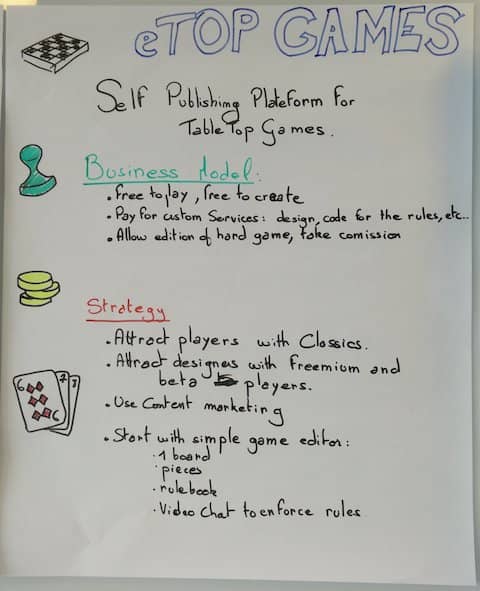
Let's take an example to illustrate how to run the workshop. Imagine you are in a software company that builds a self-publish board games website.
The website also lets people play their games online. In the examples below, we will be running the Design-Level Event Storming on this "live game" bounded context. It is one of many functional areas of the whole system.
1. The target design

Before you start, you’ll need to ensure that everyone understands what Design Level Event Storming is about. Refer to our previous post, How to explain Design Level Event Storming to your mother, for detailed instructions to present the workshop and all the vocabulary.
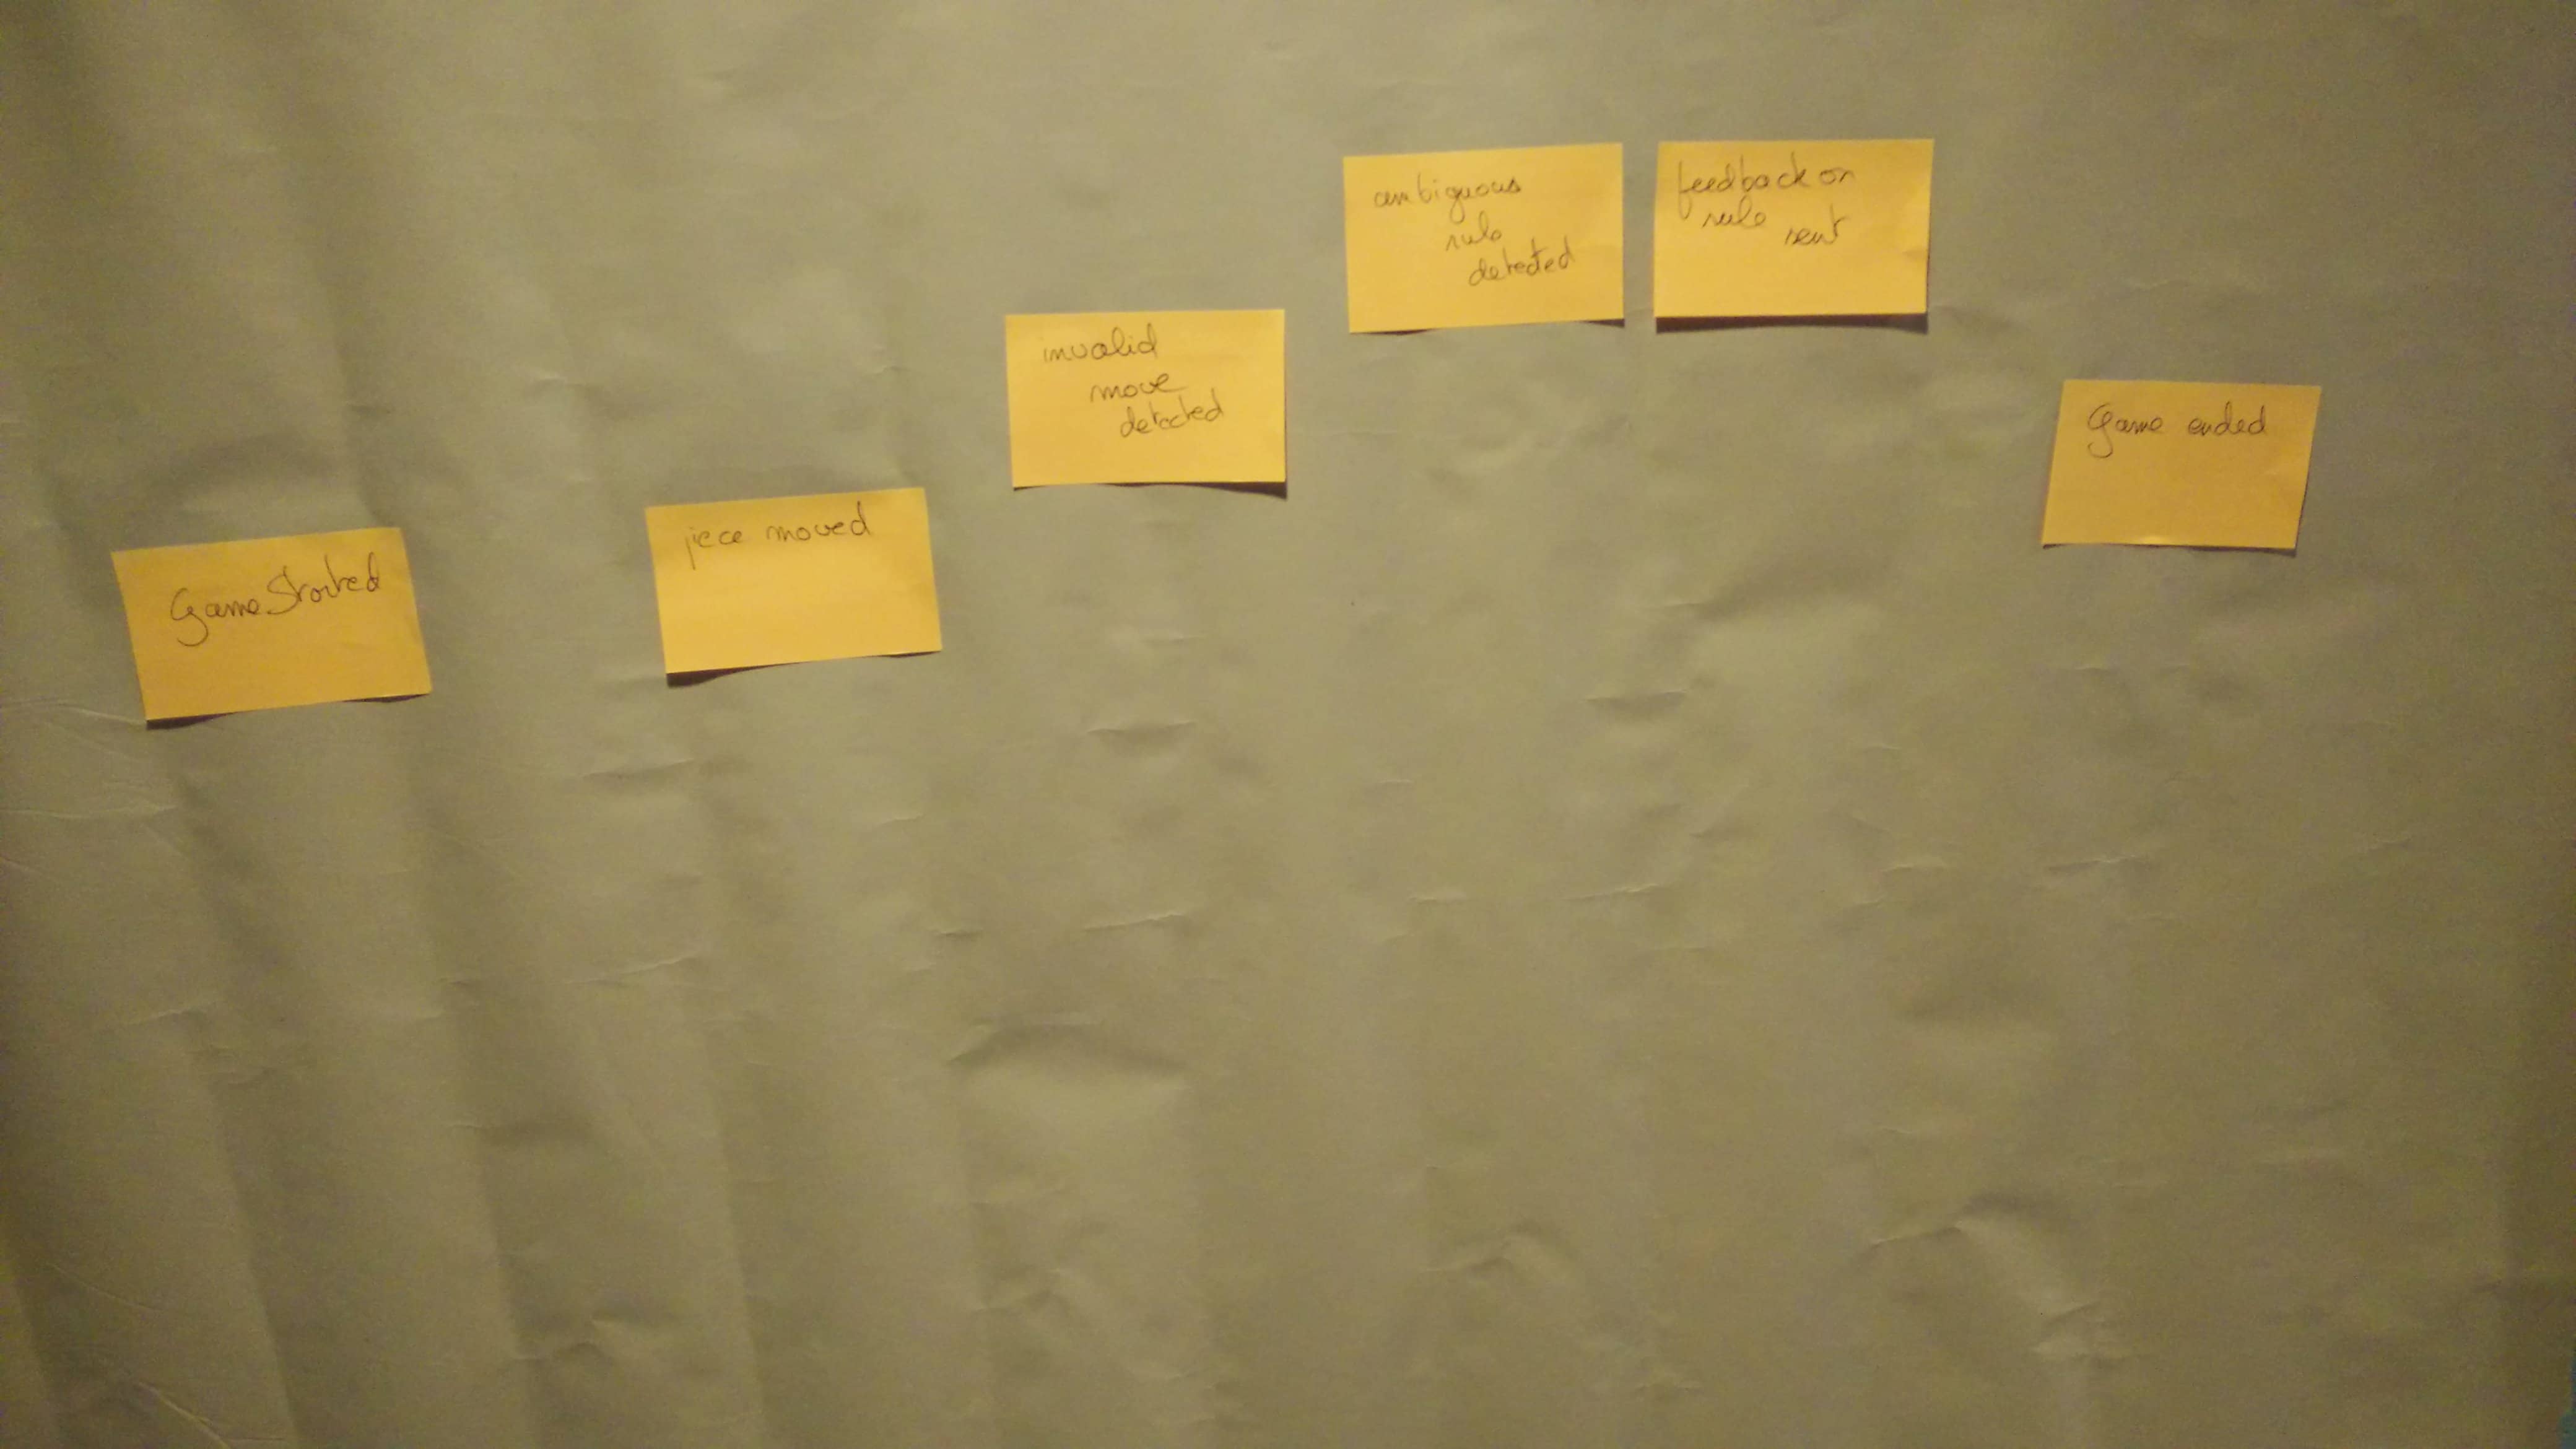
The workshop will make the above pattern of stickies emerge step by step.
2. Domain Events
The first thing you’ll need in a Design-Level Event Storming is domain events!
If you are running this workshop after a Big Picture Event Storming, copy the events from the part of the system you are focusing on to another blank design board. As usual, we are using orange stickies for events.
If starting from scratch, you will still need to generate events. You can run the first steps of the Big Picture Event Storming on your limited scope:
- Events Generation
- Events Sorting
- Actors and External Systems
- Storytelling
Check A detailed agenda of Event Storming to learn how to run these steps in detail.
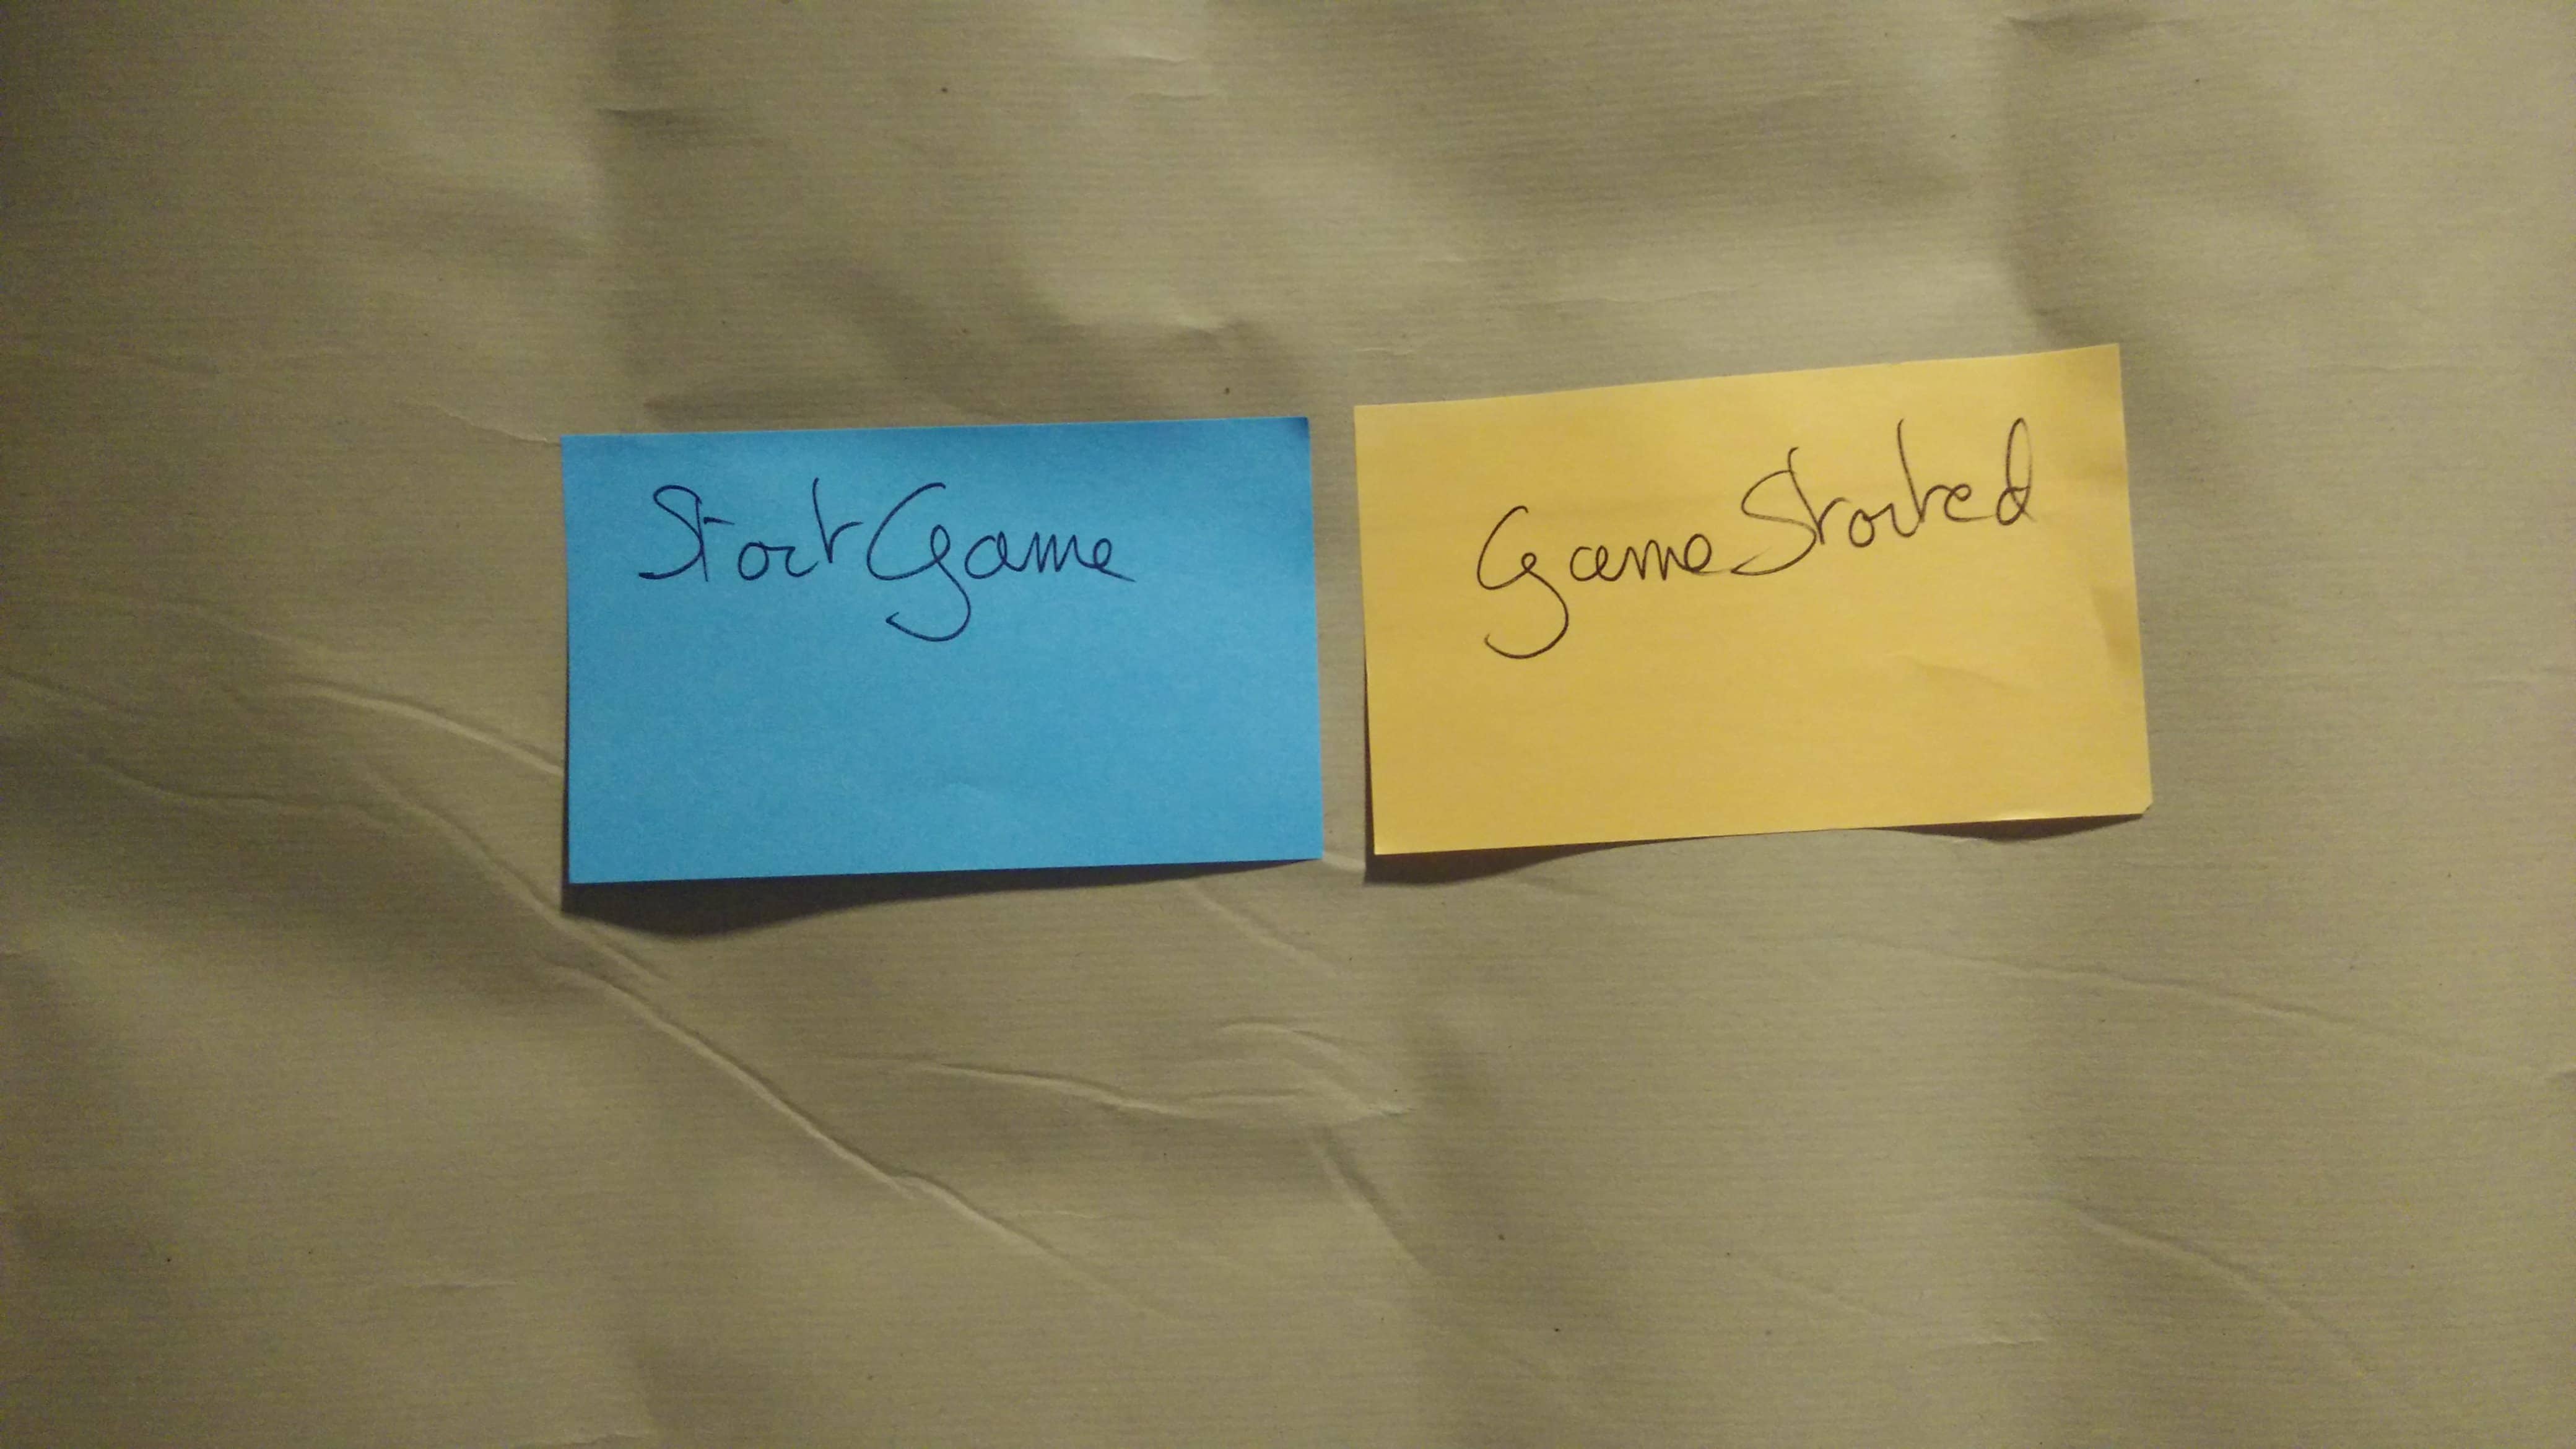
3. Commands
The next step is to prefix every domain event with a blue command sticky. This step is straightforward: if you have an event called “Game Started”, prefix it with the command “Start Game”. Sometimes, the command names are a bit different, but you should manage to figure this out.
4. Actors or policies
Commands can either be sent by a human (an actor) or automatically by a policy.
Go through all the commands and prefix them with an actor or a policy.
If you have been through a Big Picture Event Storming, you should have identified the actors, so copy them.
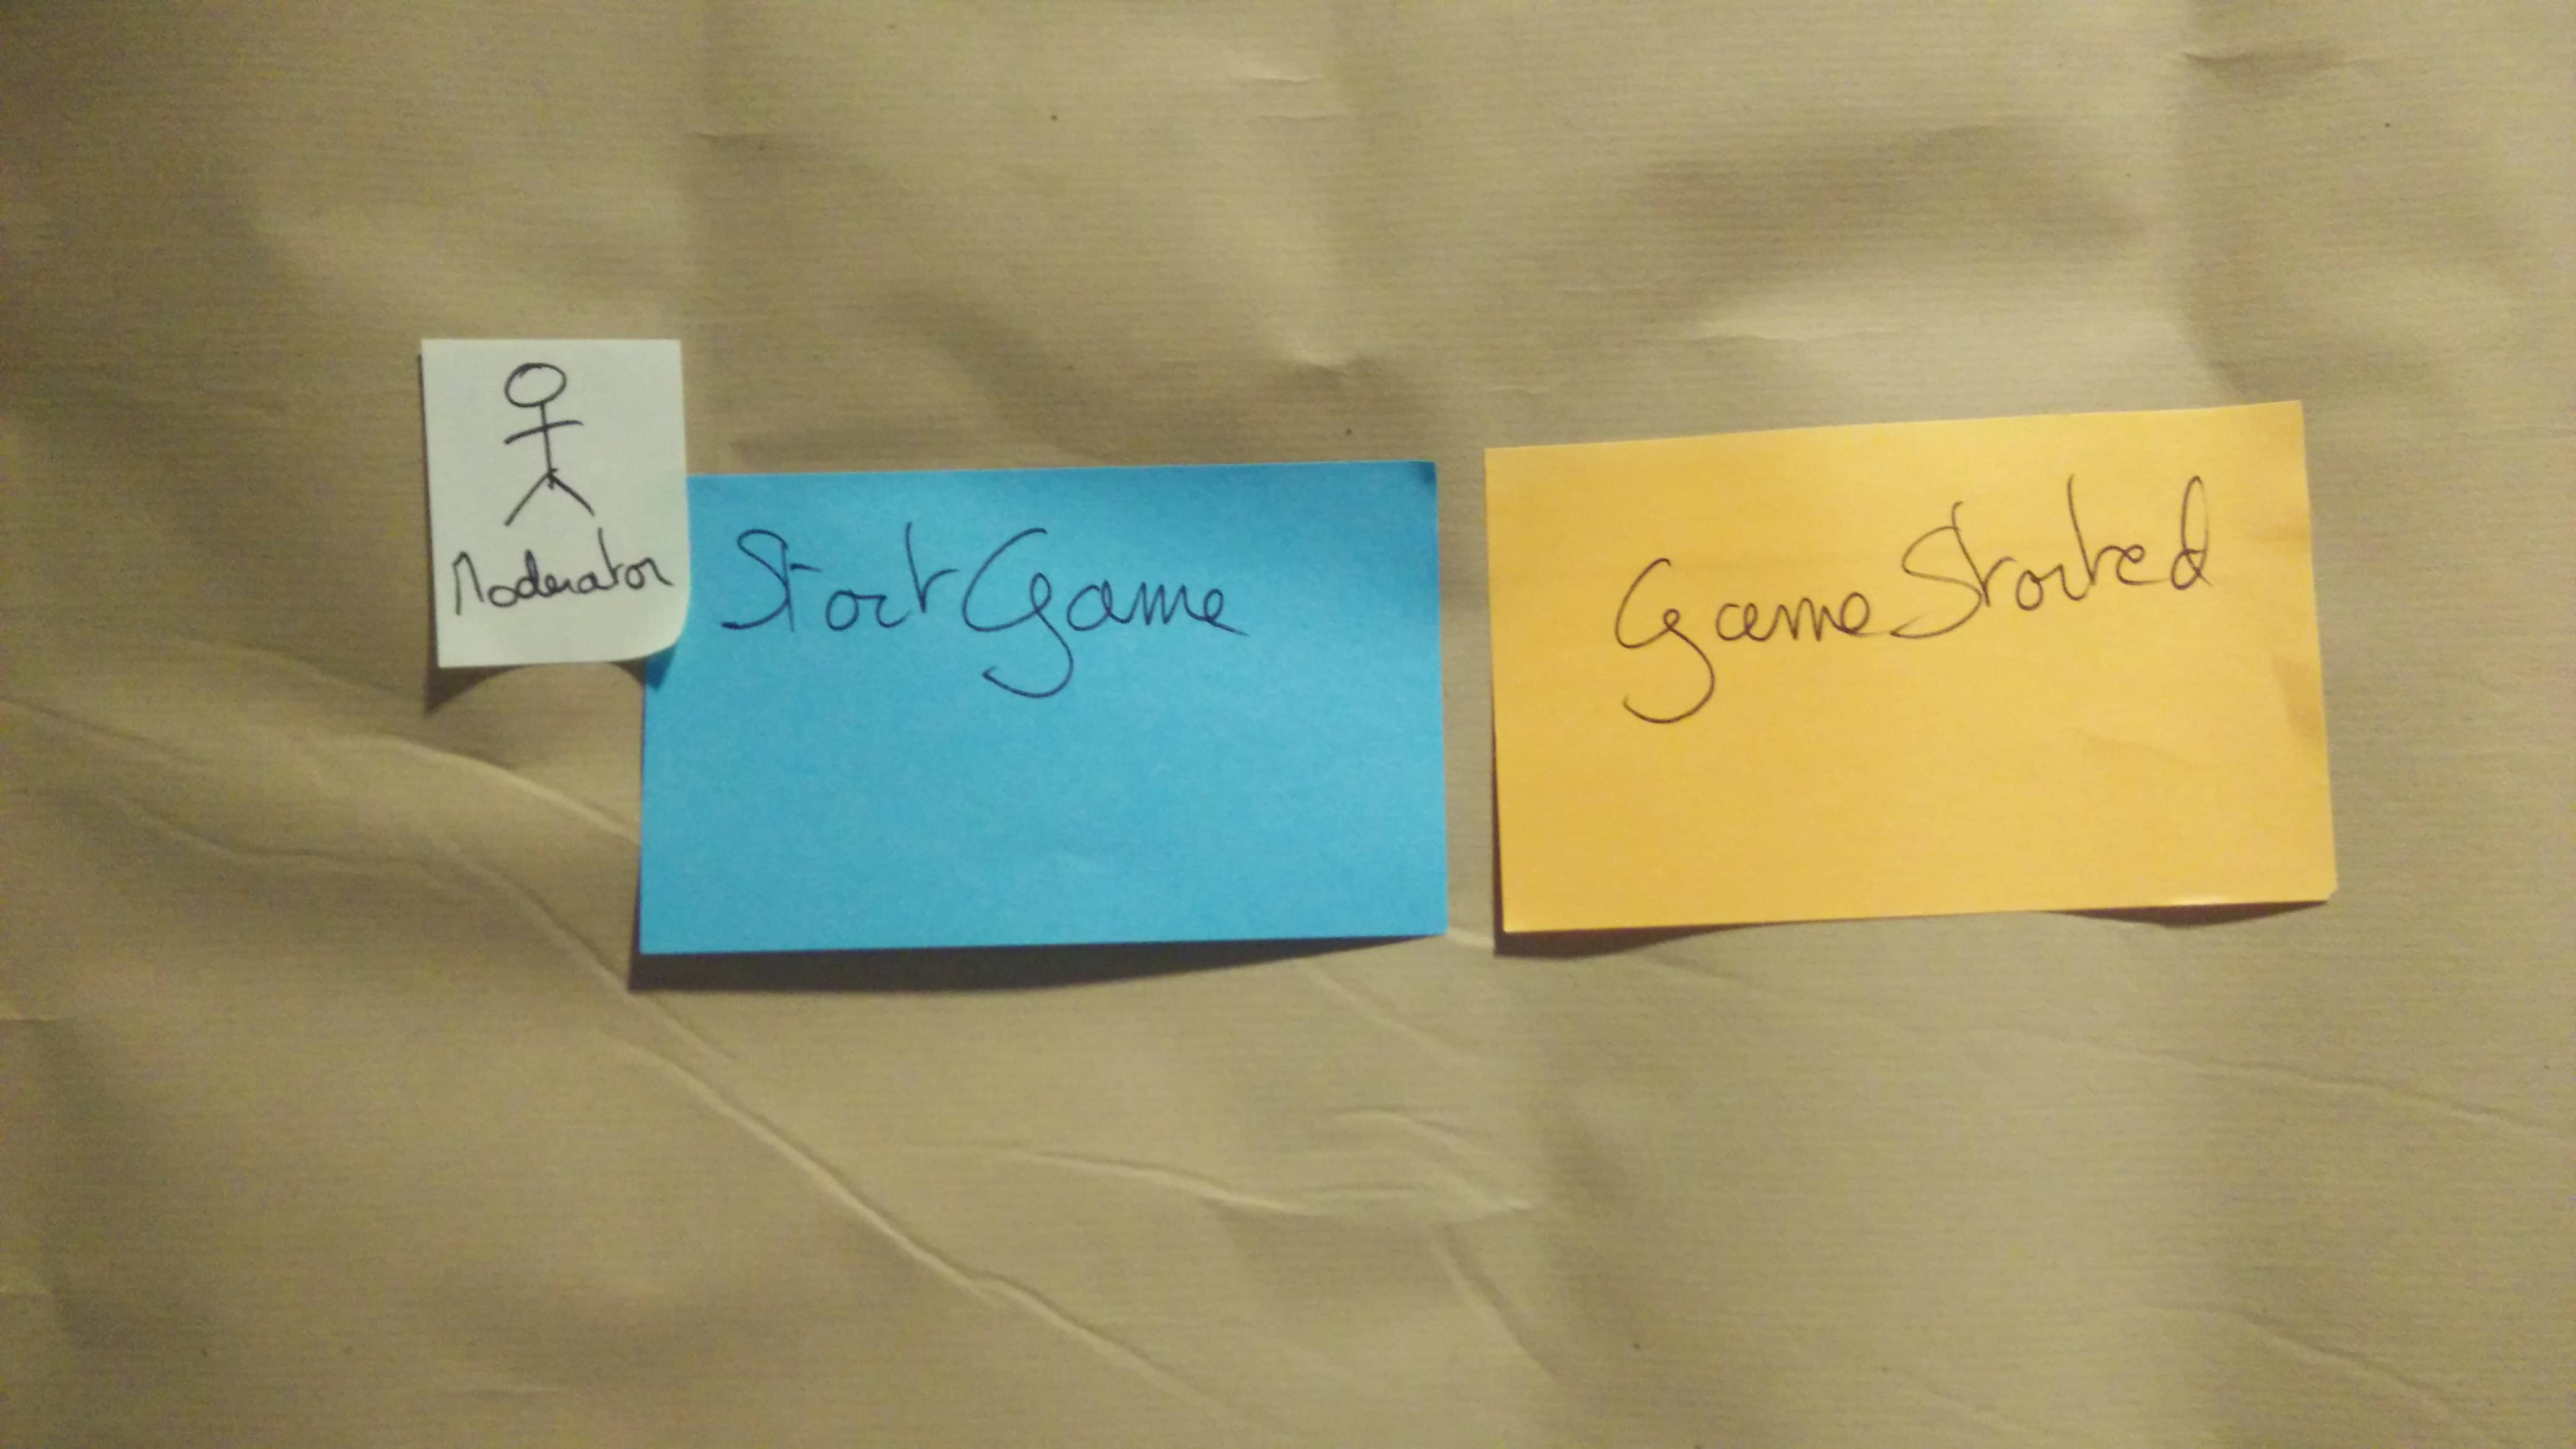
Actors should have a title, and policies should follow the form “Whenever Event X, then Command Y.”

(Note: Policies are sometimes manually automated: a human does it. In this case, it’s simpler to keep modeling this as a policy rather than introducing a ‘dumb’ actor)
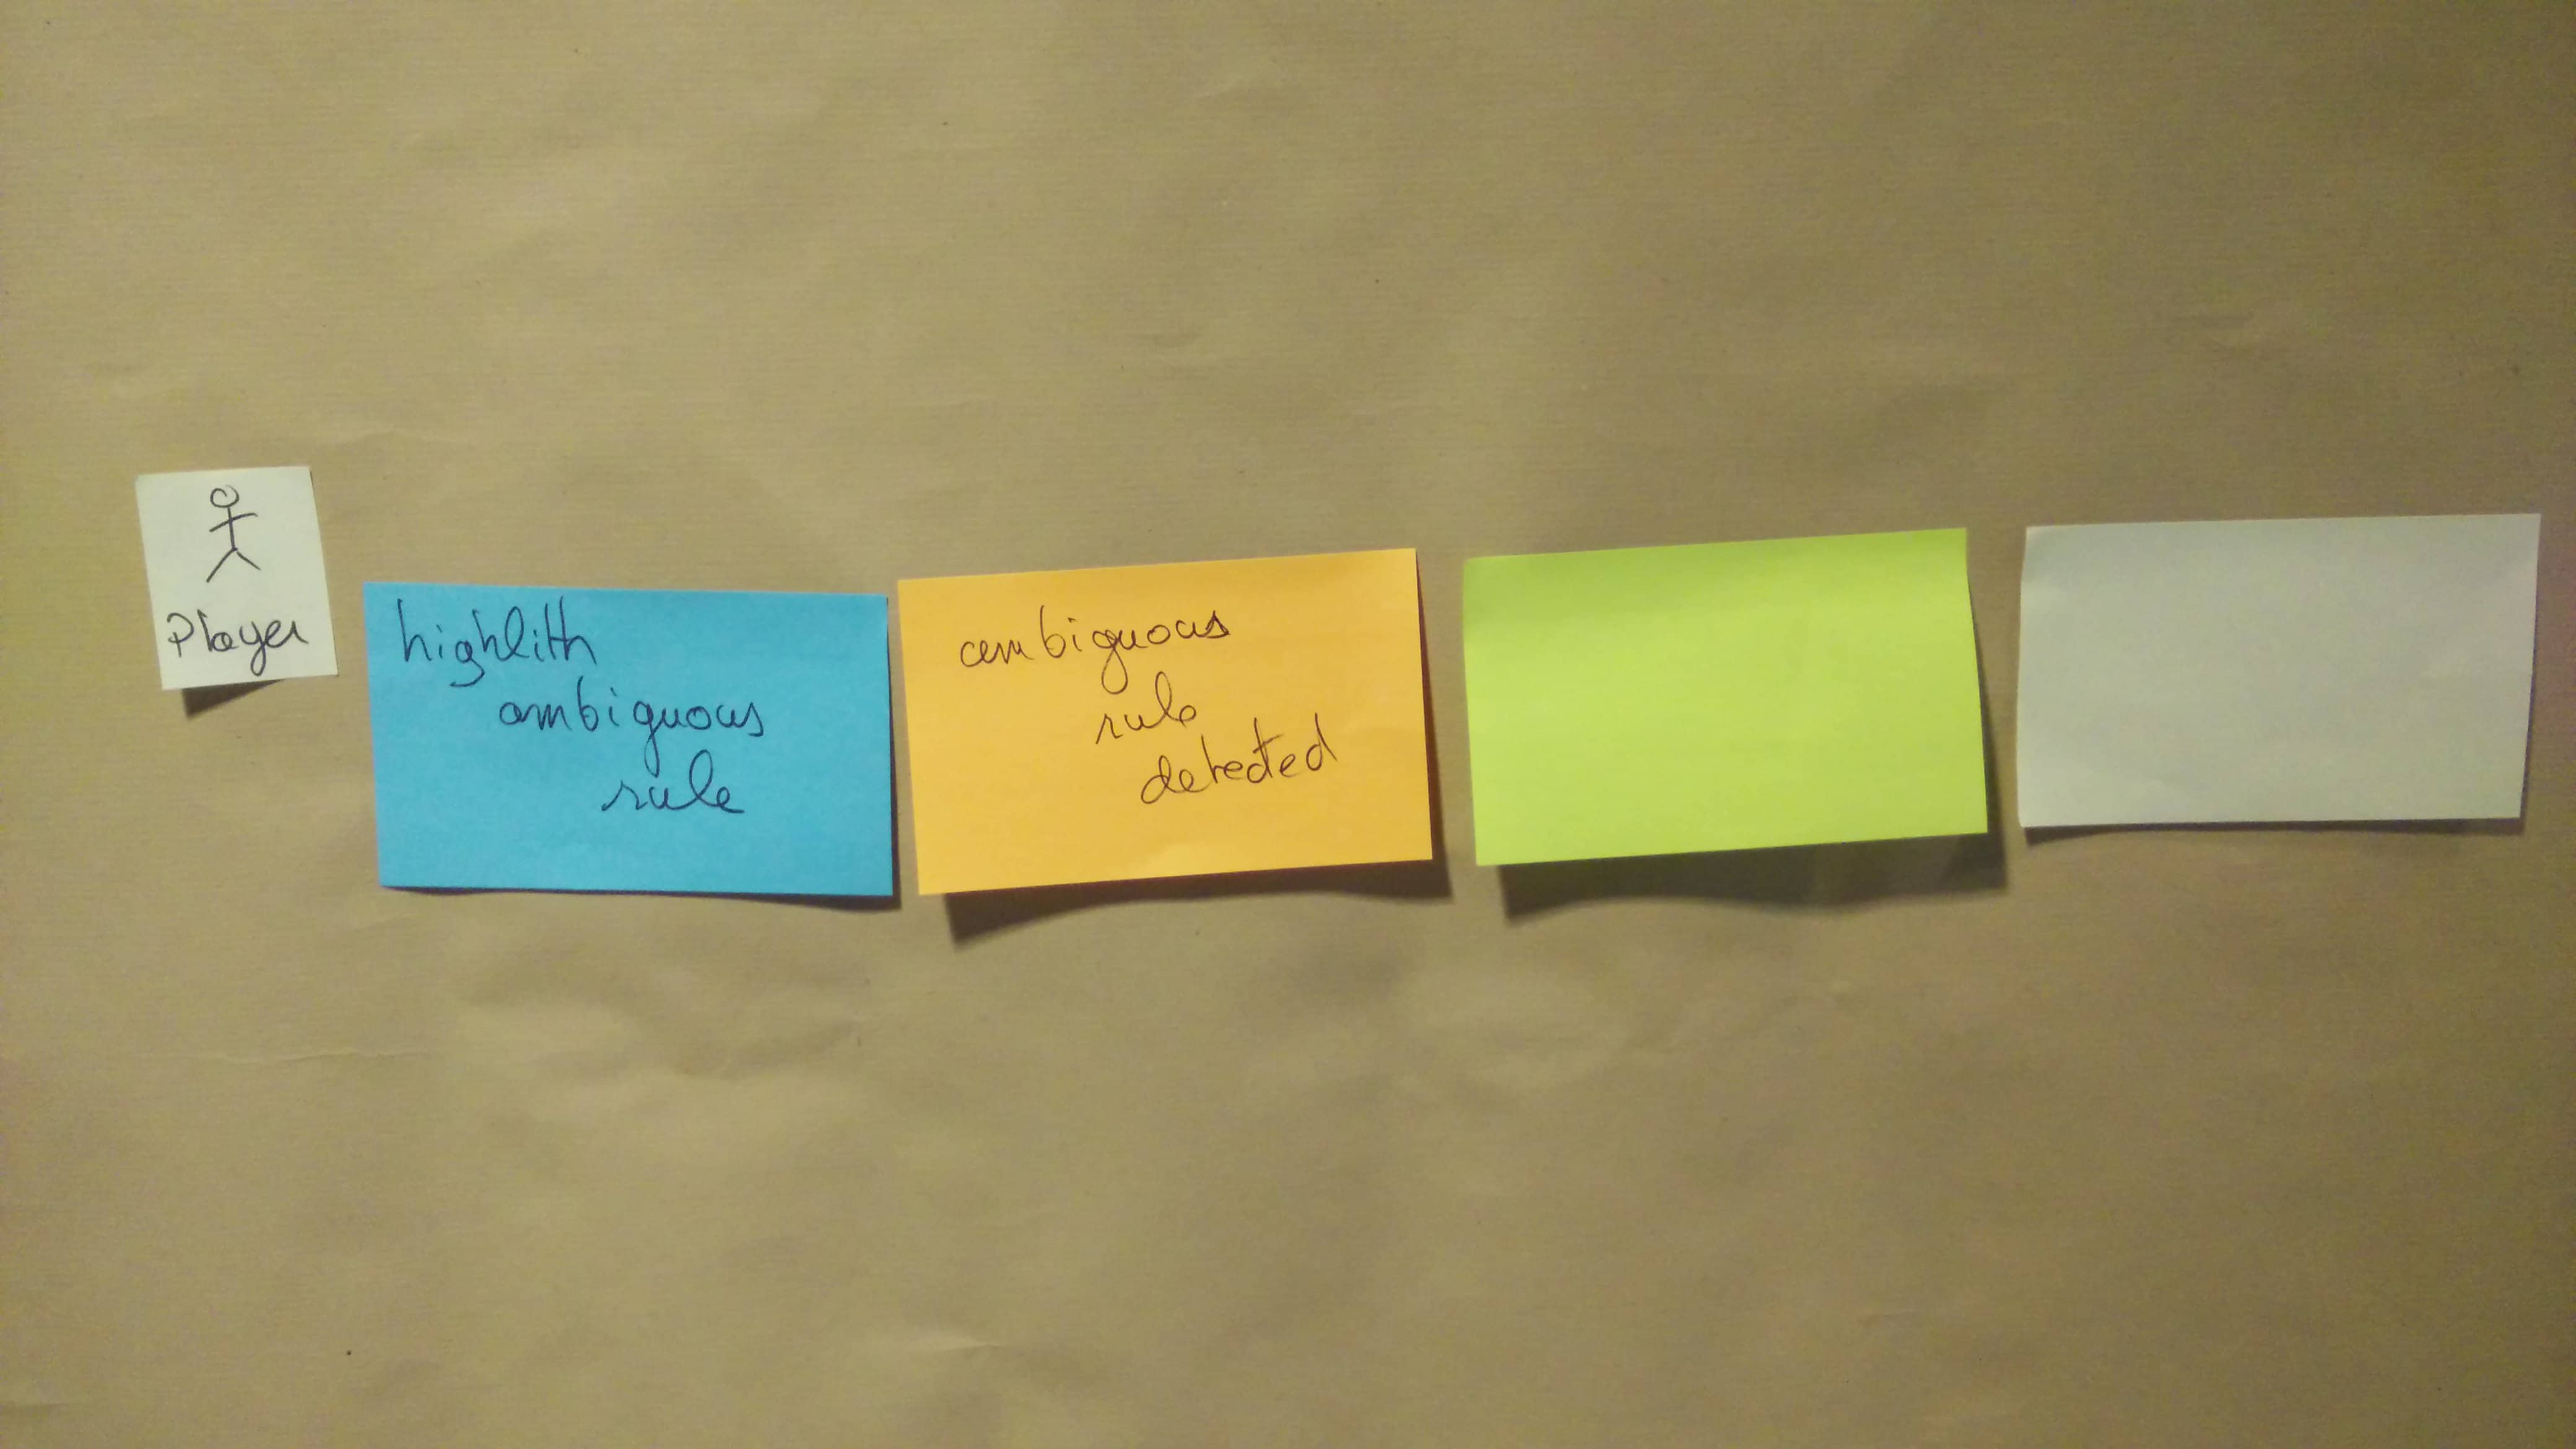
5. Blank stickies for what the actors will see
Actors need information before they can send a command. So, again, we’ll use stickies for that!
Again, this step is a mechanic: add blank green and white stickies between domain events and actors!
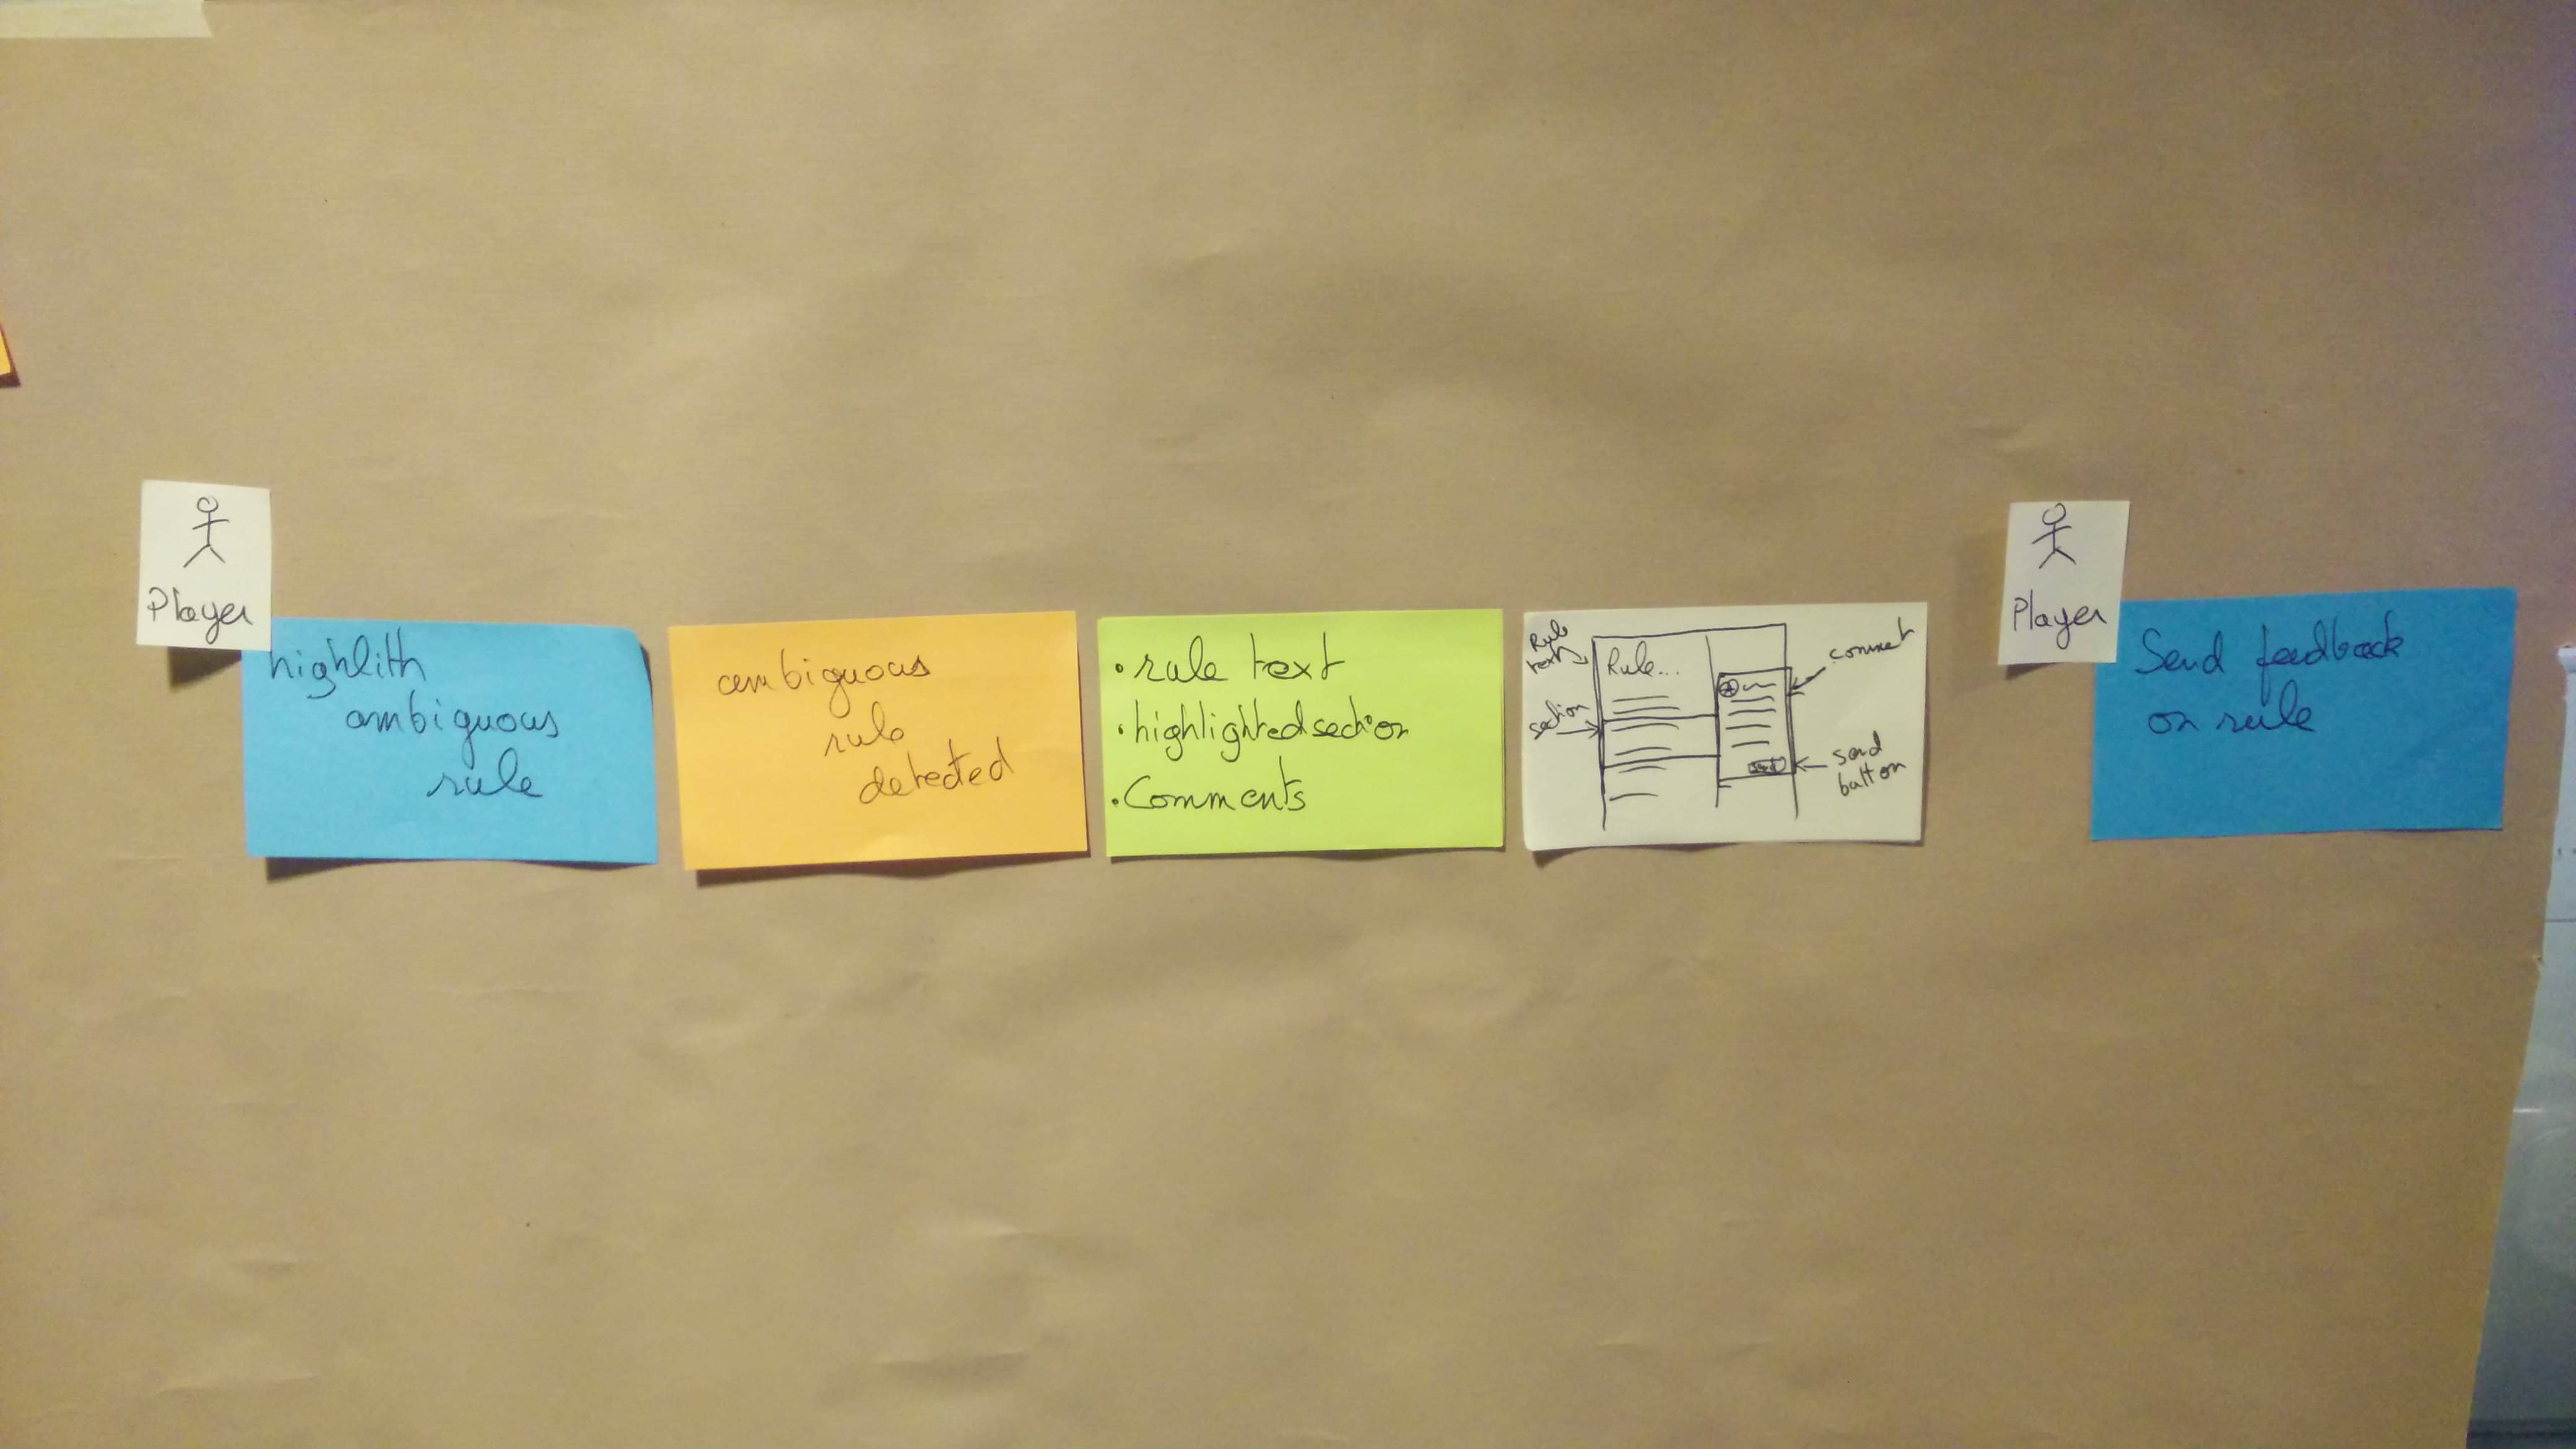
6. Read models and UX mock-ups
Let’s list the information the actors need to send their commands.
💡 Design-Level Event Storming is the perfect workshop to discuss the UX of domain events
- First, write down the data you want to display on the green sticky. This is a Read-Model.
- Second, on the white sticky, sketch the user interface that will display the data on the screen. This is a UX mock-up.
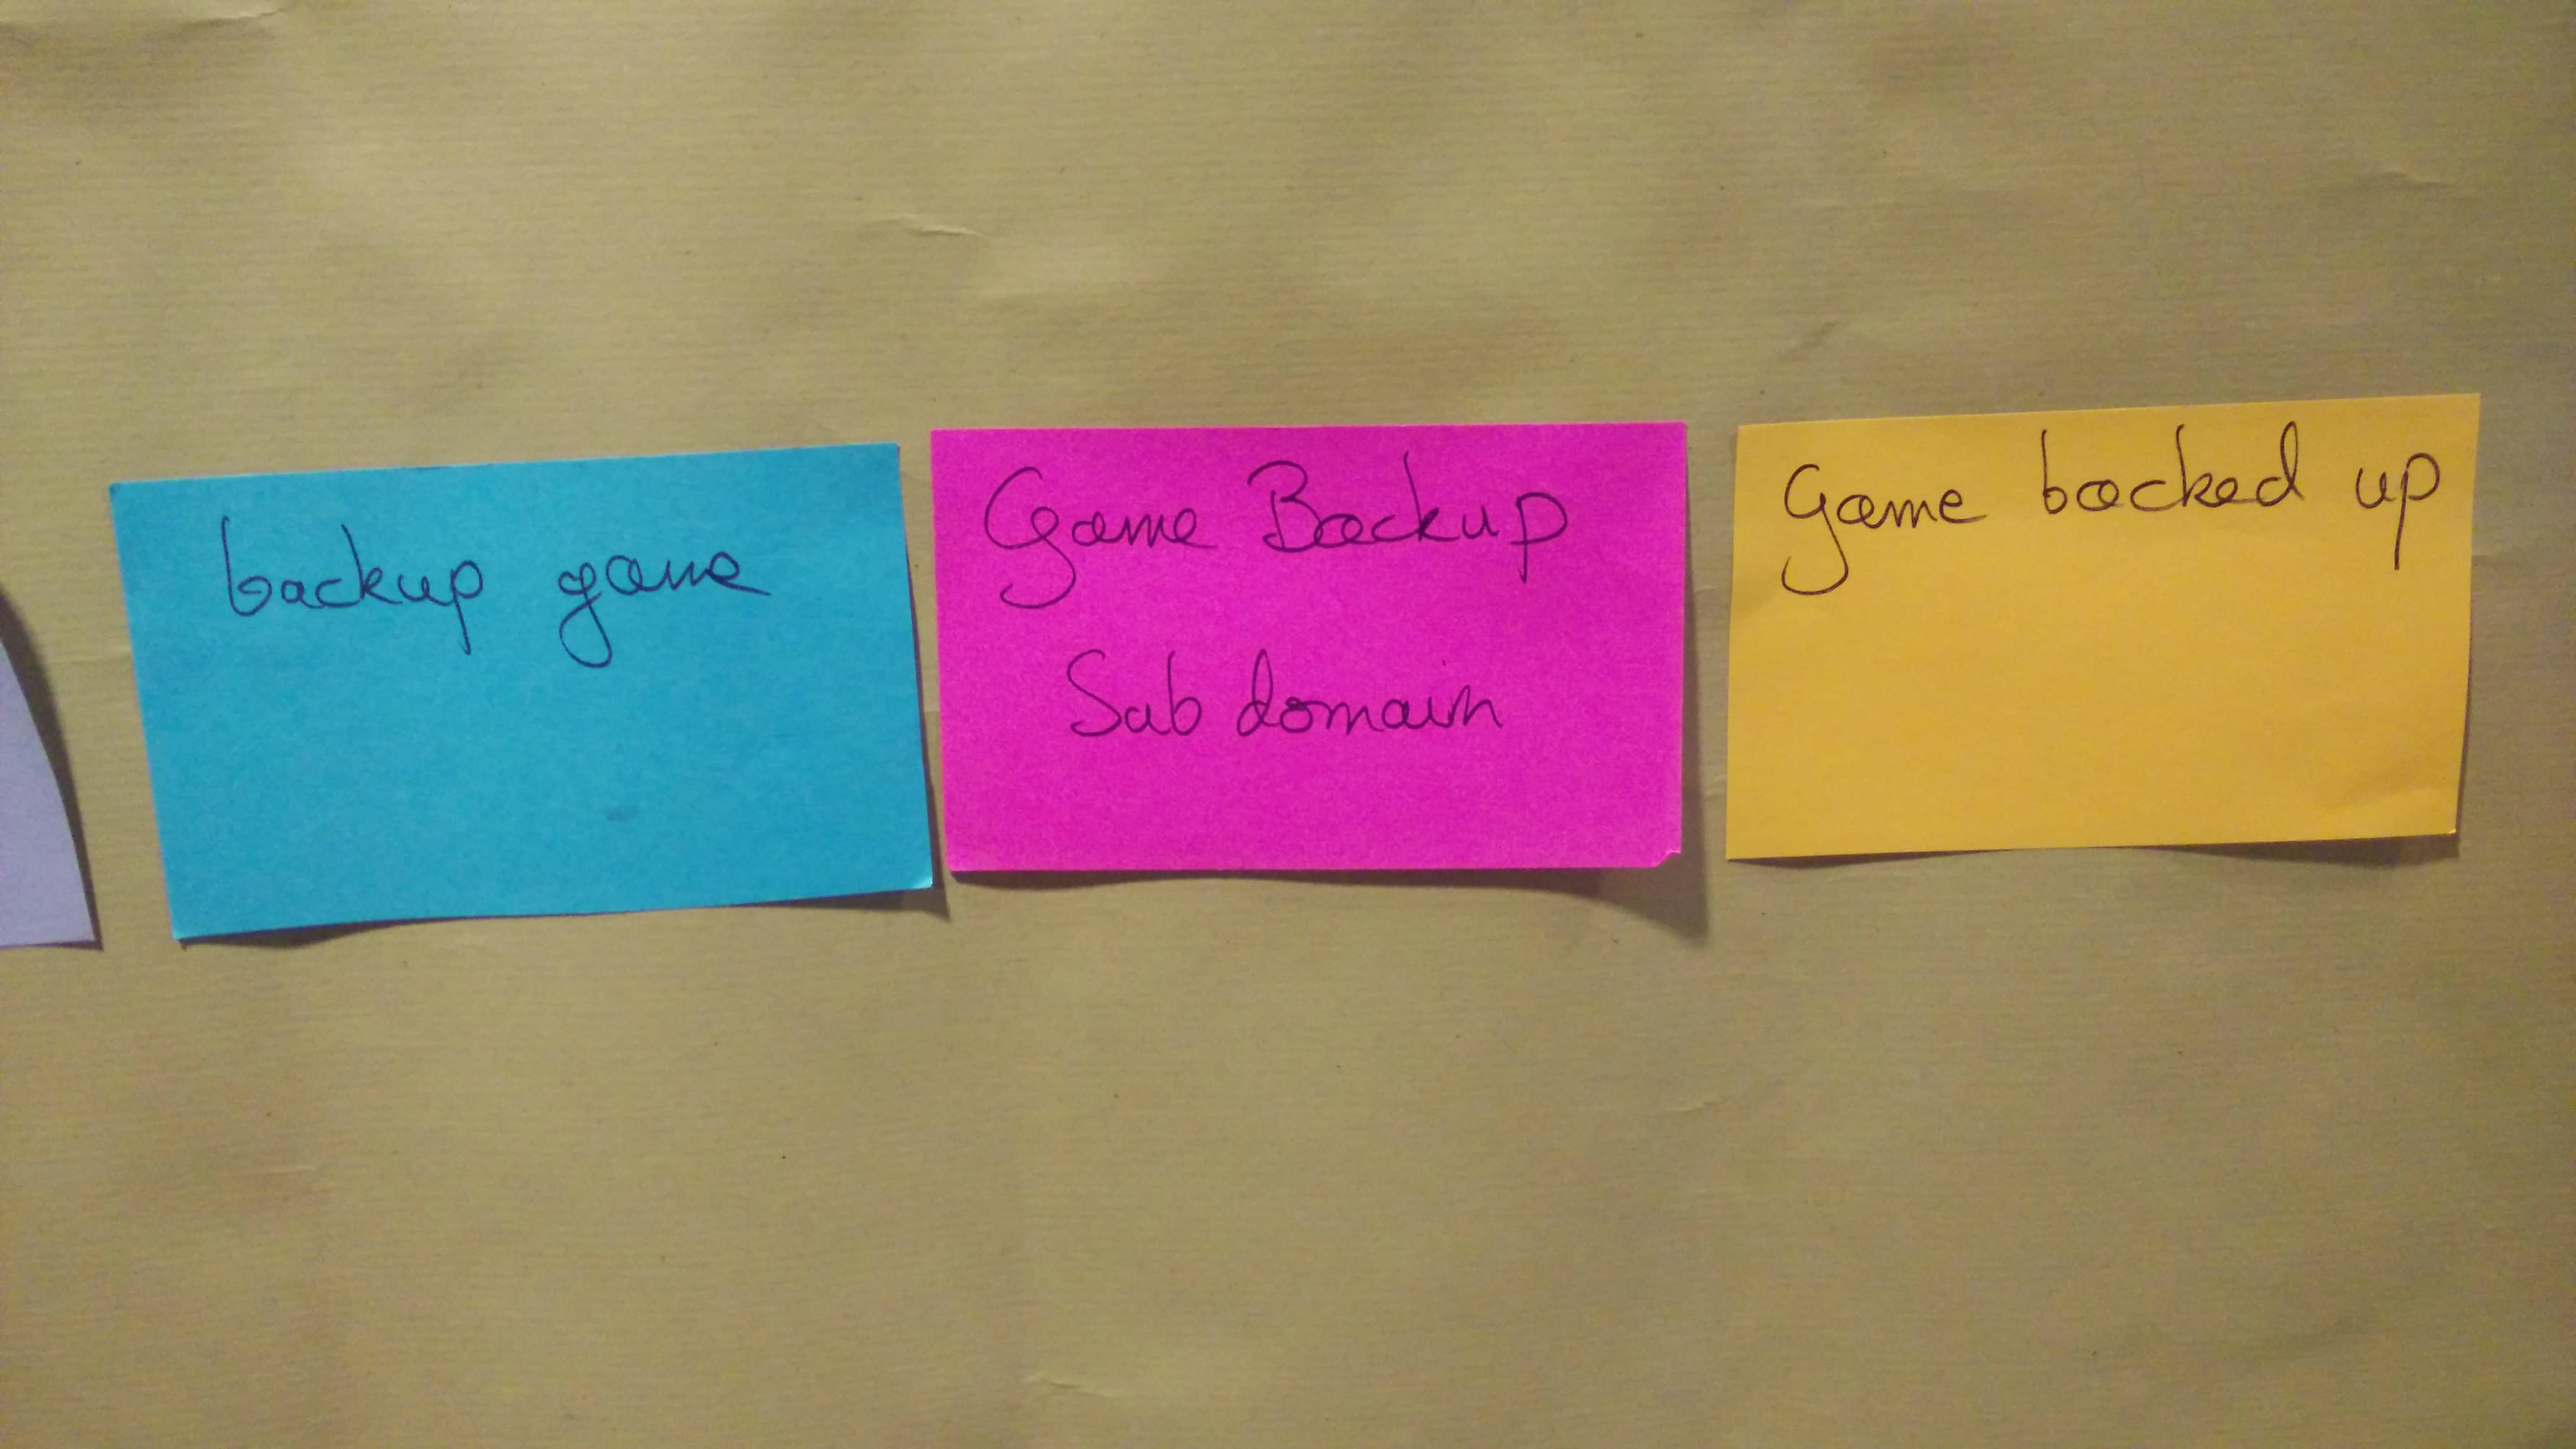
7. External systems
You’ve been looking at what happens ‘after’ a domain event. Let’s dive into what happens between a command and an Event.
The “picture that explains everything” shows that external systems also raise domain events.
If you have done a Big Picture Event Storming before, you should have spotted a few external systems. Copy them to pink stickies and stick them between Commands and Events.
If you haven’t gone through a Big Picture Event Storming before, go through all commands and add pink stickies for external systems where it makes sense.
In the scope of a bounded context, other contexts become external systems too! Go through all the remaining commands. Add a pink sticky between the command and the event when they involve another context. Write the name of the other context on the pink sticky.
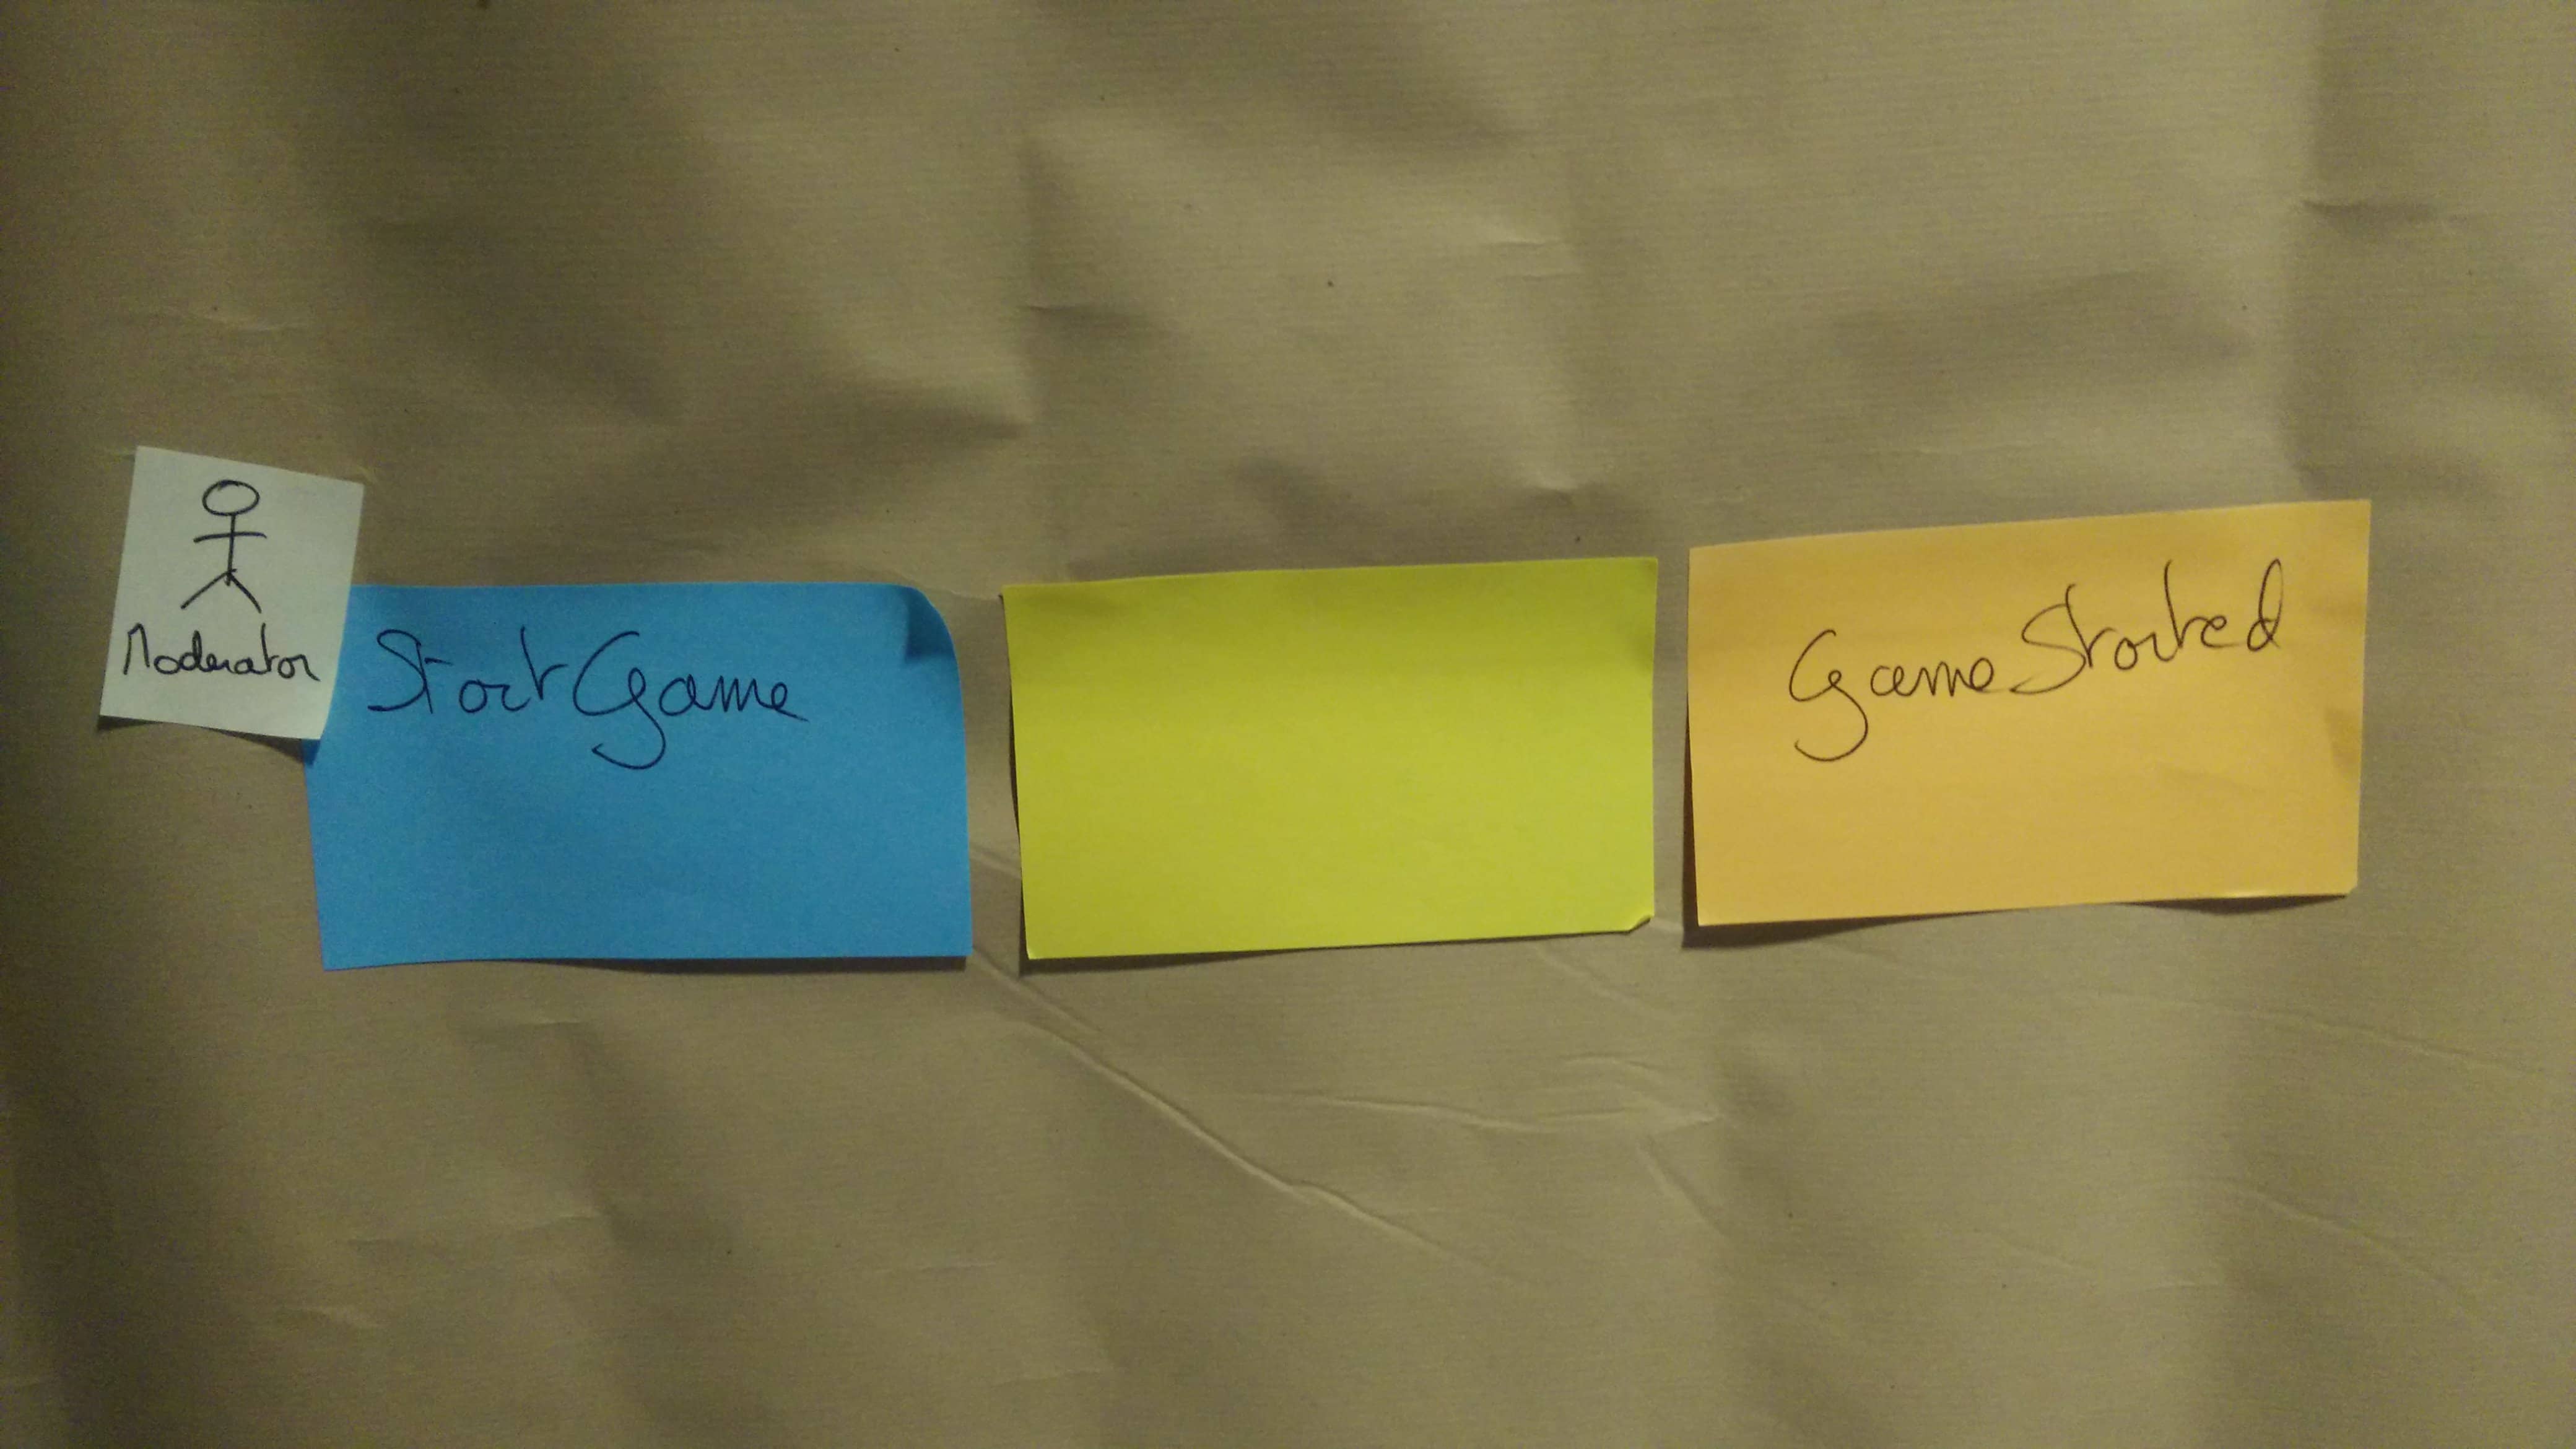
8. Blank Business Rules
Here’s another mechanical step. If an external system did not raise an event, a business rule must have triggered it.
Go through all commands and events not linked by an external system. Add an empty yellow sticky there.
9. Business Rules
💡 Discussing Business Rules is the critical moment of Design-Level Event Storming
Ask participants to fill in these business rules with what happens during its execution:
- What is true before (preconditions).
- What is true after (postconditions).
- What remains true all along (invariants).
- Any additional information to clarify what the business rule does.
Some business rules are dead-simple, while others will trigger much discussion. This knowledge-sharing between domain experts and developers is invaluable.
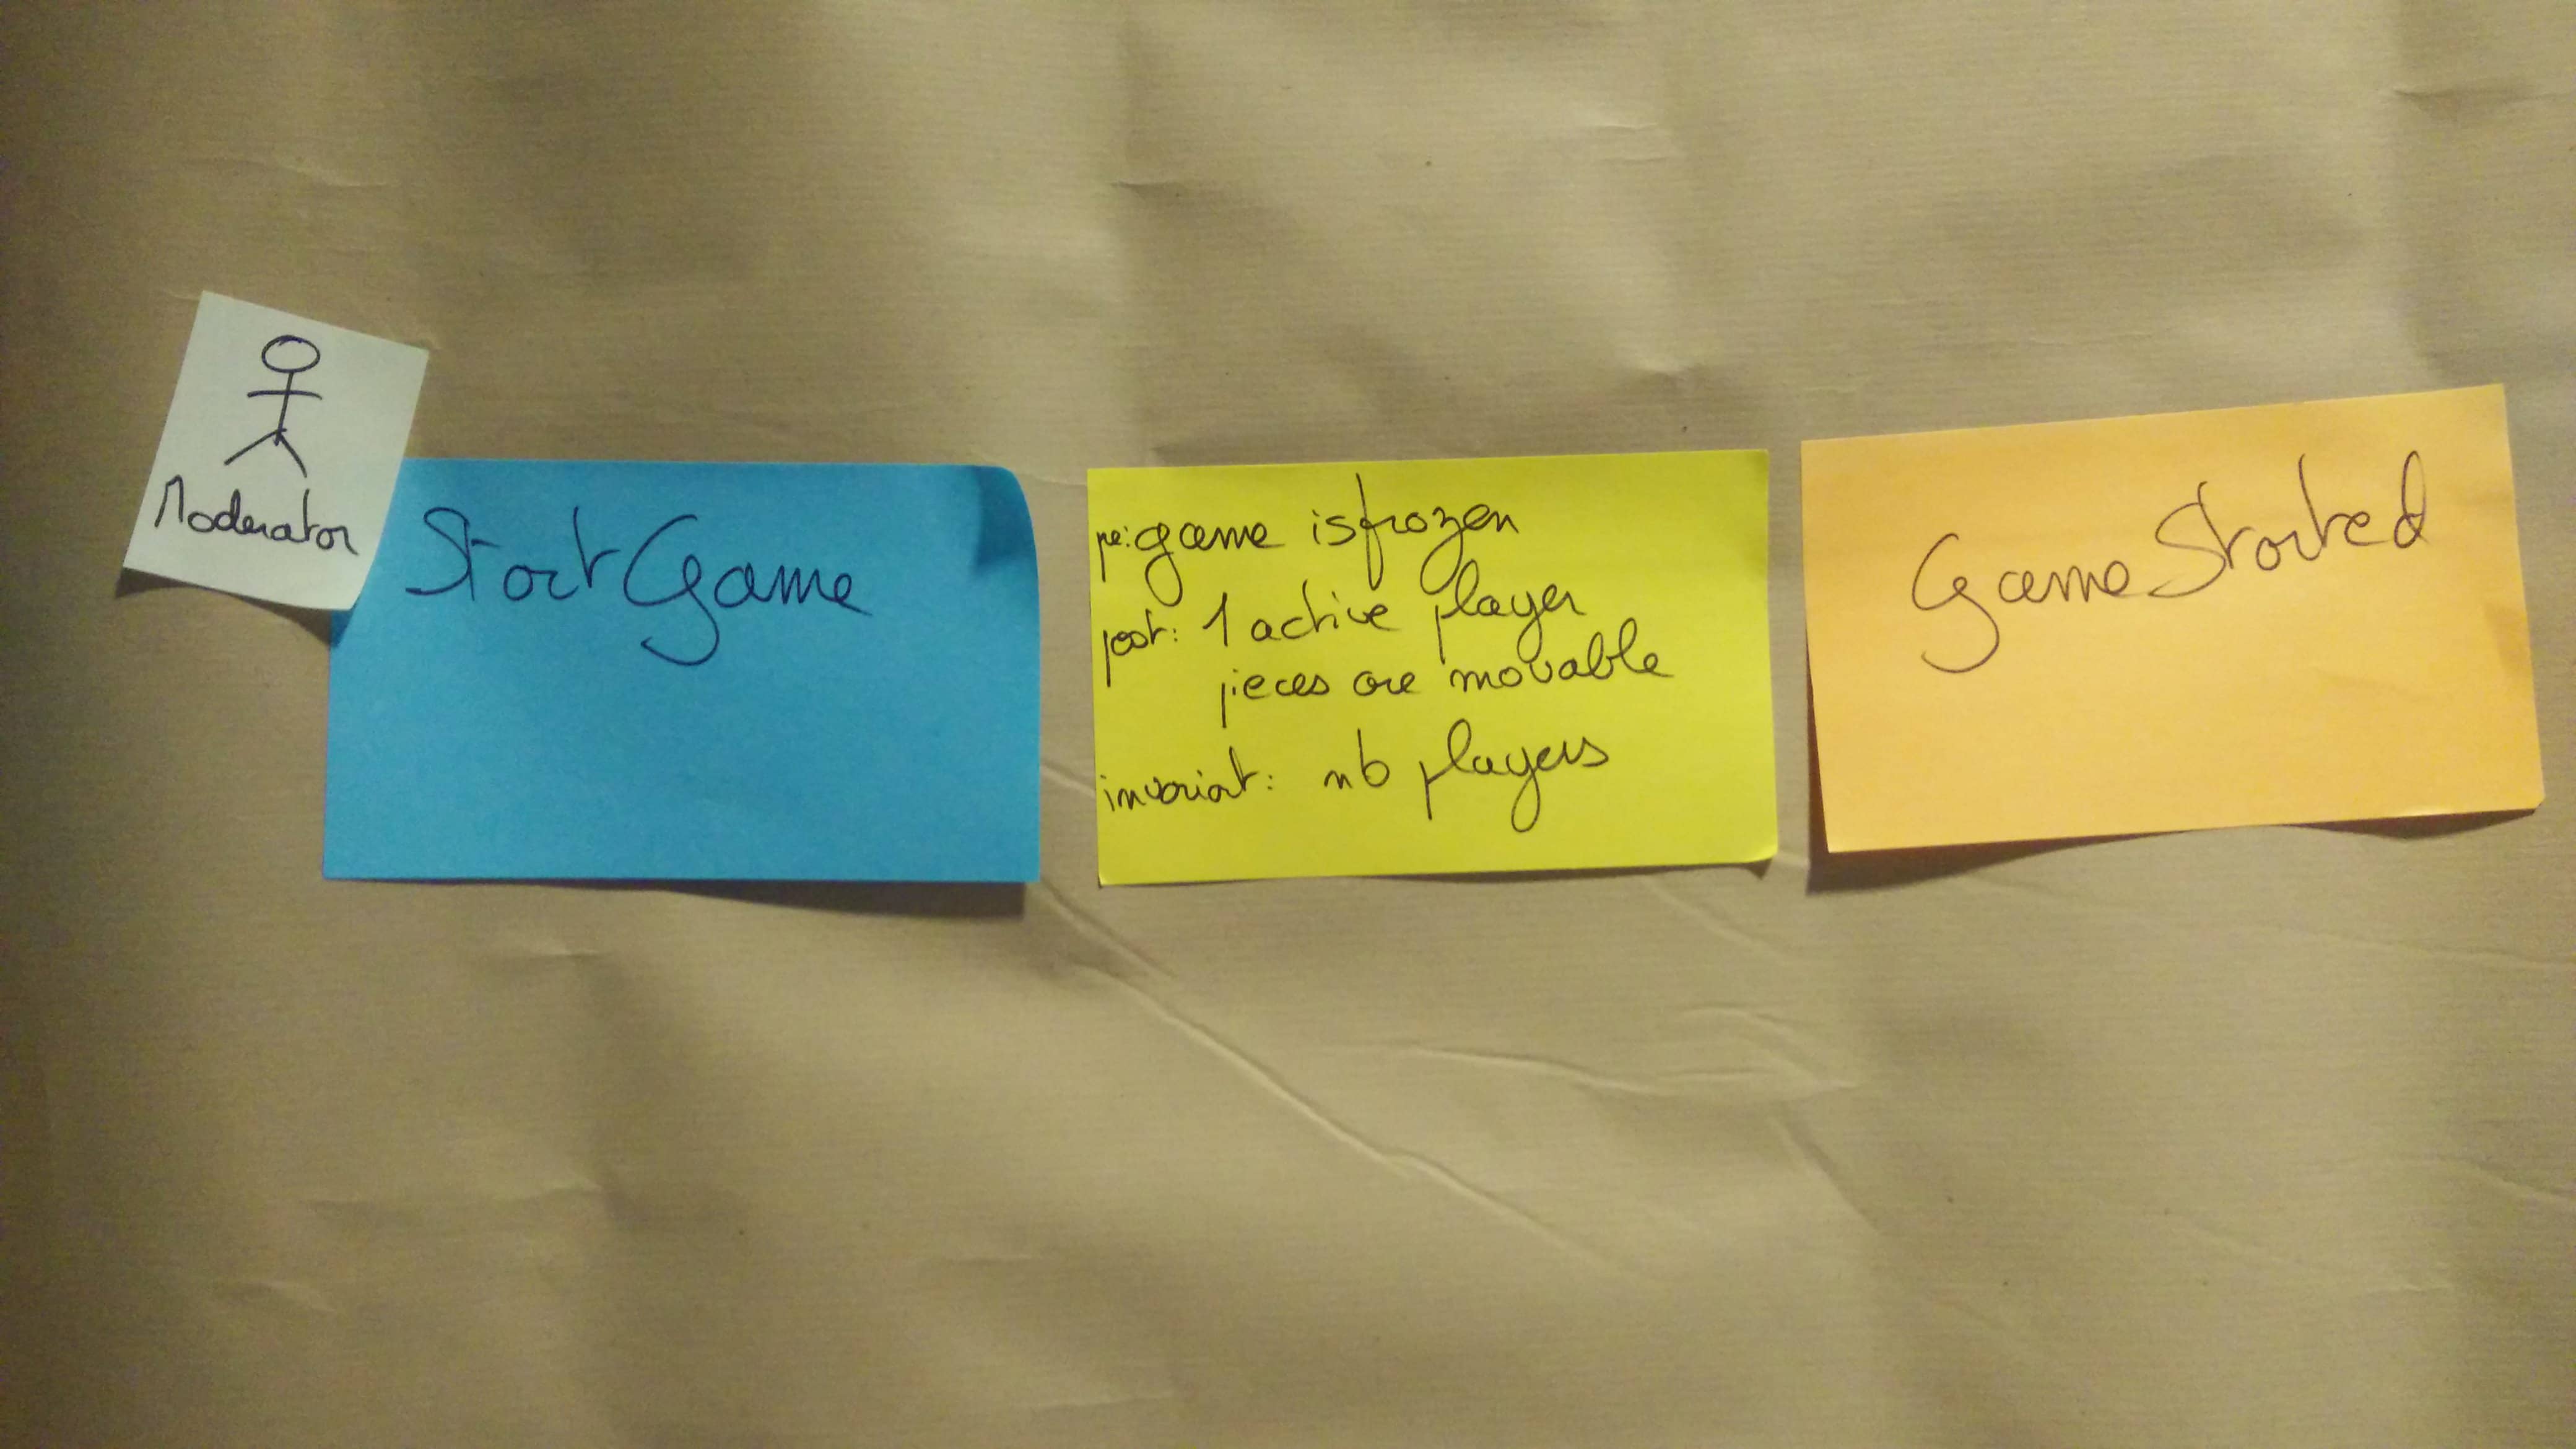
These conversations can be an occasion to use other practical conversation formats like Example Mapping
10. Aggregates of Business Rules
Up to here, you’ve always kept the chronology in the design. Now, you will break this to get closer to code design!
When you spot two business rules that deal with similar data, move them on top of one another. Your board should now look like that:
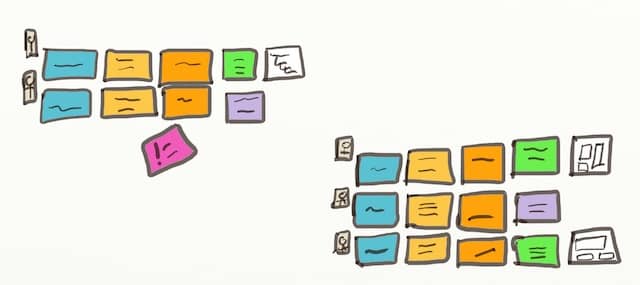
11. Aggregates Names
By aggregating business rules, you have formed Aggregates in the Domain-Driven-Design sense!
💡 Finding good names for Aggregates is the last thing to do in a Design-Level Event Storming
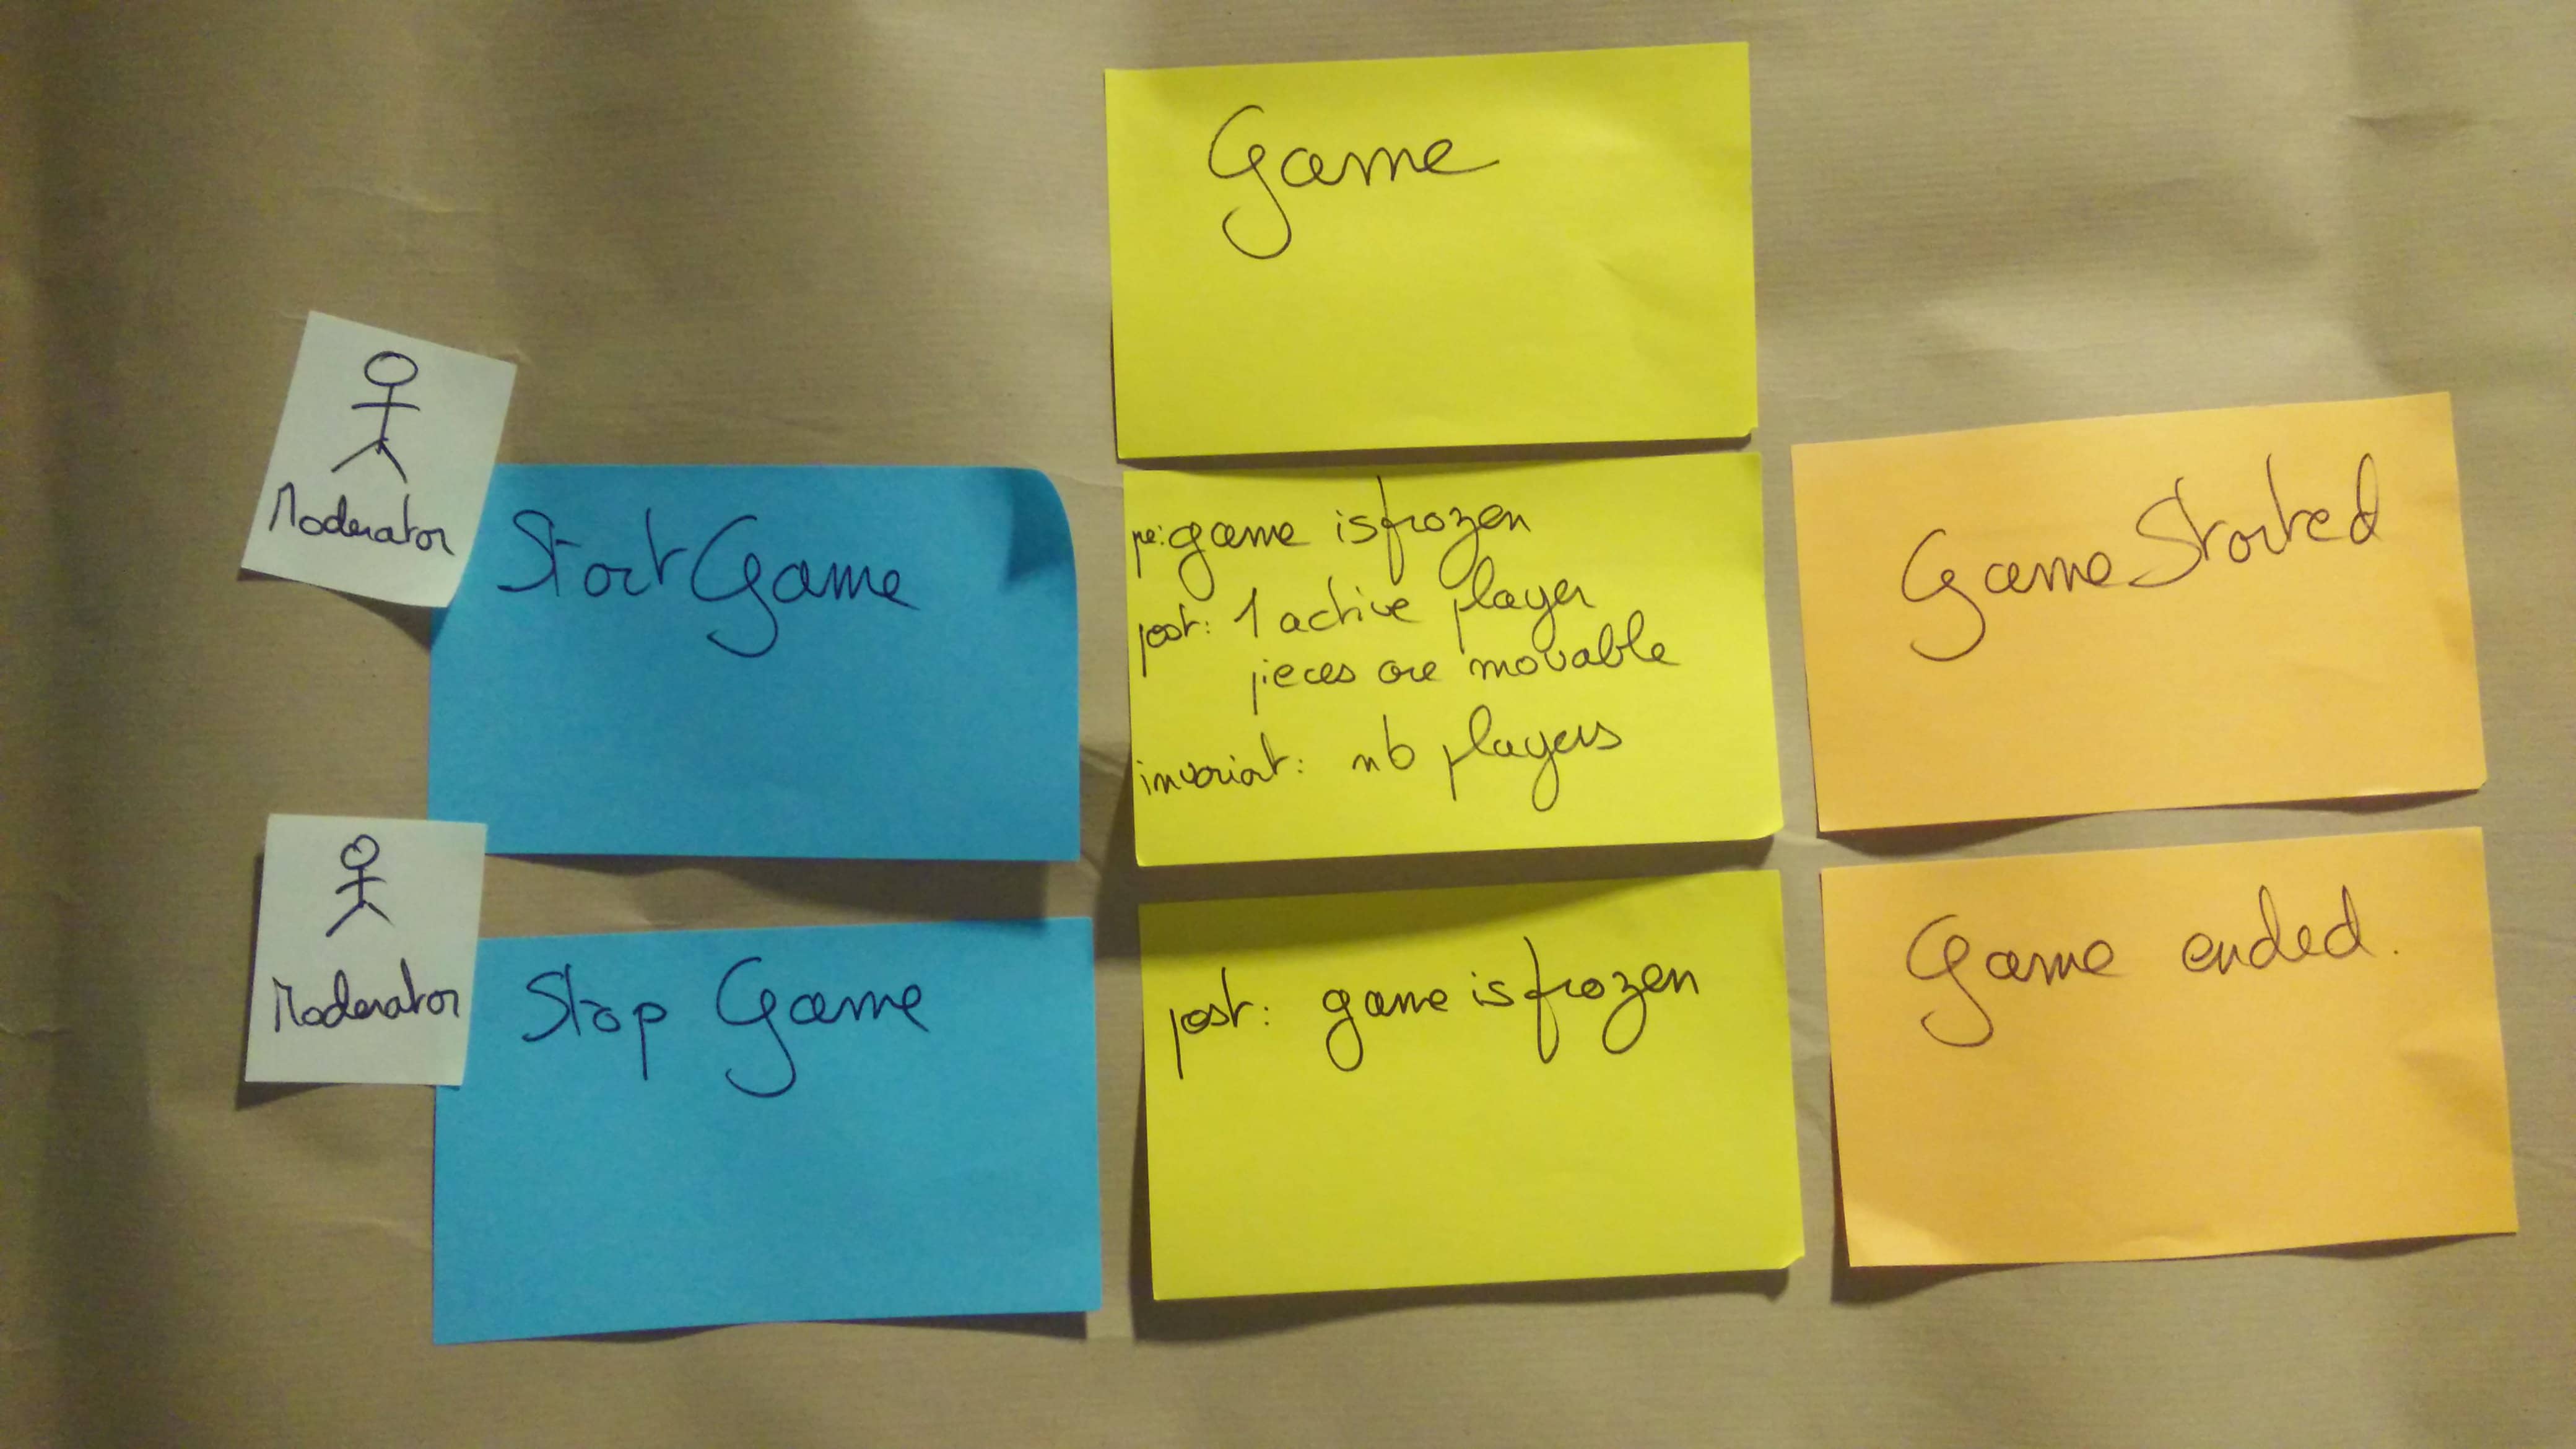
At this point, it should be easy to name your aggregates! So next, add an extra yellow sticky on top of the aggregates to give the group a name. For example, in the image below, the Aggregate’s name is “Game.” This is because it groups two business rules that deal with game workflow.
That’s all, folks!
You’ve reached the end of the workshop! As you’ve seen, Design-Level Event Storming is very structured yet leaves space for critical discussions.
To summarize, you started with the following:
- An important bounded context
- Some domain events in this context
And you ended up with:
- Aggregates and business rules
- Design mockups for user screens
- Automation policies
- A list of interaction points with actors and external systems
- And the most essential thing: shared knowledge and understanding between everyone involved
Here are three examples of what you could do after the Design Level Event Storming:
- Start coding
- Dive into business rules, with activities like Example Mapping
- Or refine your understanding of the Bounded Context, for example, with the Bounded Context Canvas.

You’ve learned everything there is to know to facilitate your first Design Level Event Storming. If you have already run a Big Picture Event Storming, there is nothing to be afraid of here.
Send the invites, and get started!
This blog post is part of the 1h Event Storming book that we are currently writing.
A previous edition of this post was originally published on Philippe’s blog
Leave a comment